
10 Bathroom Design Tips – Primary Bath Reveal
I’m so excited to share with you that I just finished renovating my primary bathroom! It’s been a long time coming – I waited five whole years to make it happen! The construction process was definitely a bit messy, and working with contractors was a bit of a roller coaster ride, but in the end, I gained a ton of knowledge and tips on bathroom design and renovation that I can’t wait to share with you! I’m really eager to hear your thoughts on the completed project too, so let’s dive in and check out my top 10 tips!
1. Make a Plan
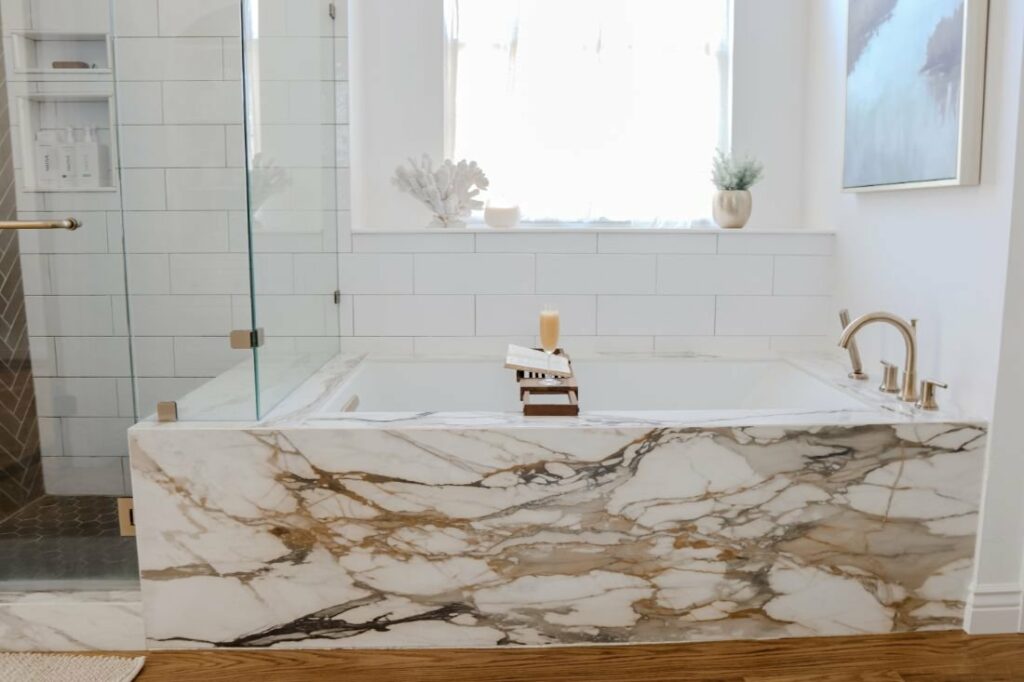
When you make a bad choice in a throw pillow, you simply return it. When you install a bad choice of tile, well, you cry! We’ve found the best way to be confident in our choices when it comes to a major renovation or build project is to create a 3D rendering.
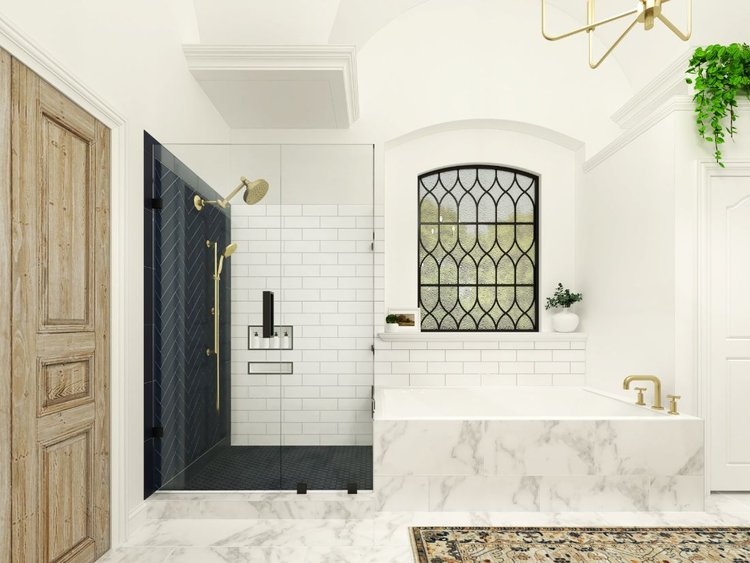
For this particular space, when we viewed the rendering, we were very happy with the overall design. However, we chose a stark black tile to create a herringbone accent wall in the shower and a black paint for the cabinet and decided we would like to soften it with a charcoal tone. In contrast, we had a simple white with gray veins on the tub surround and chose to go with a heavy vein porcelain to make a statement.
We can help you make your design choices and create a 3d rendering! We call this service Design Plan. If you’re interested reach out here.
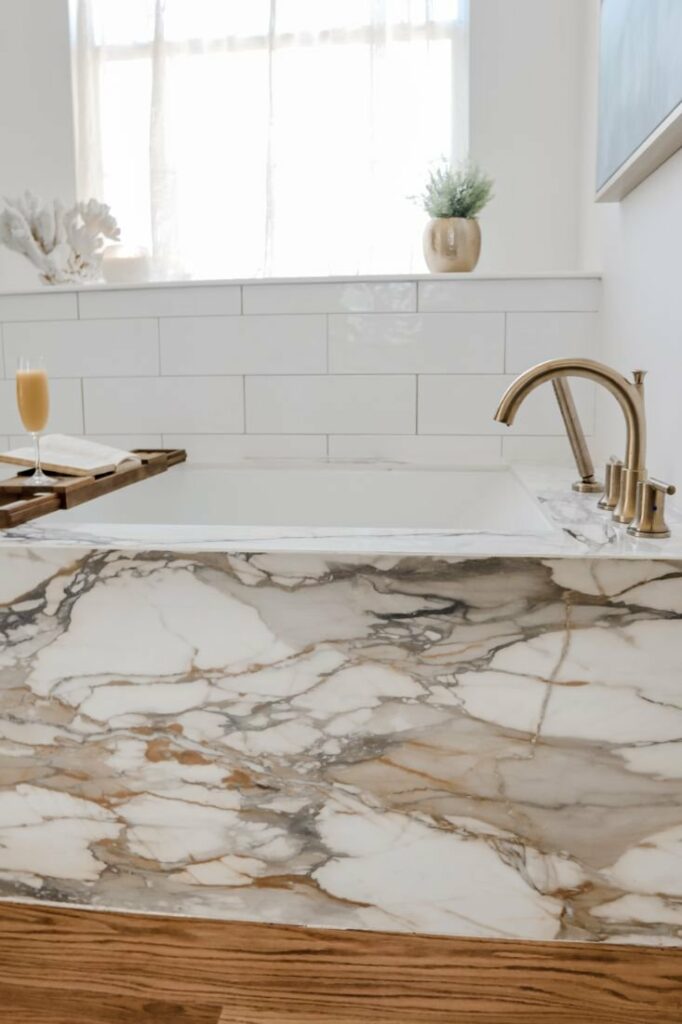
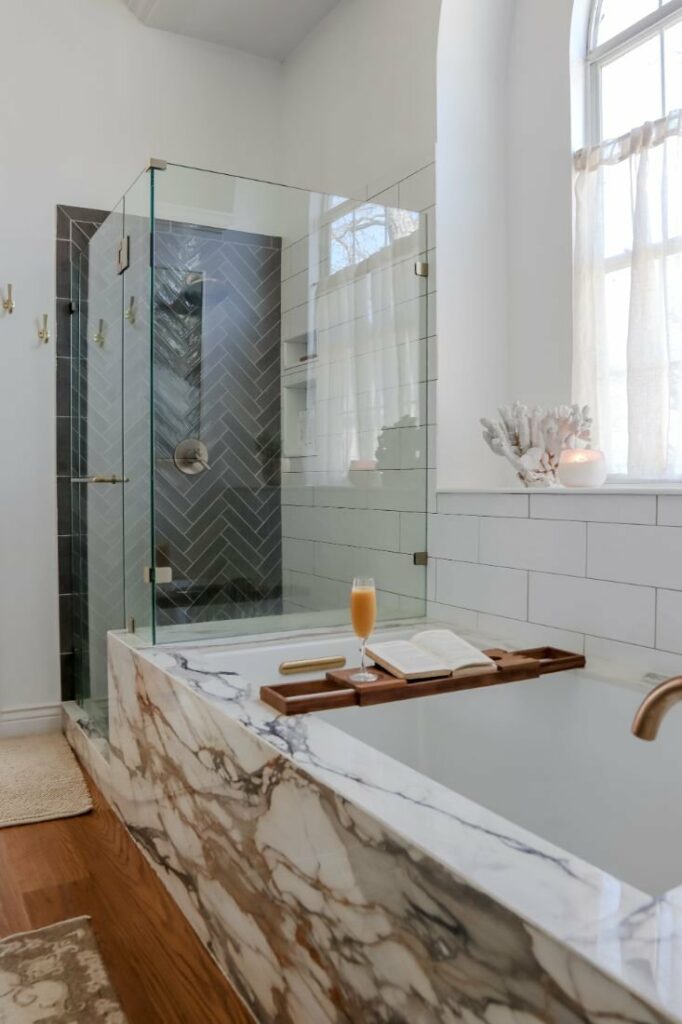
2. Don’t Be Afraid to Go Bold
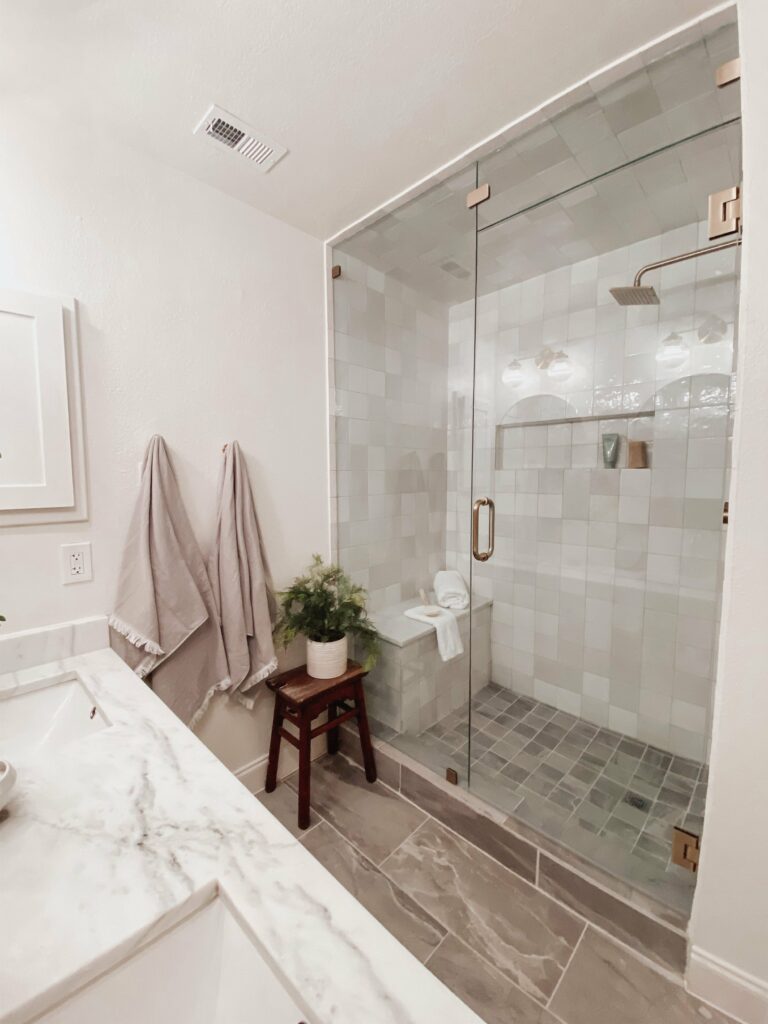
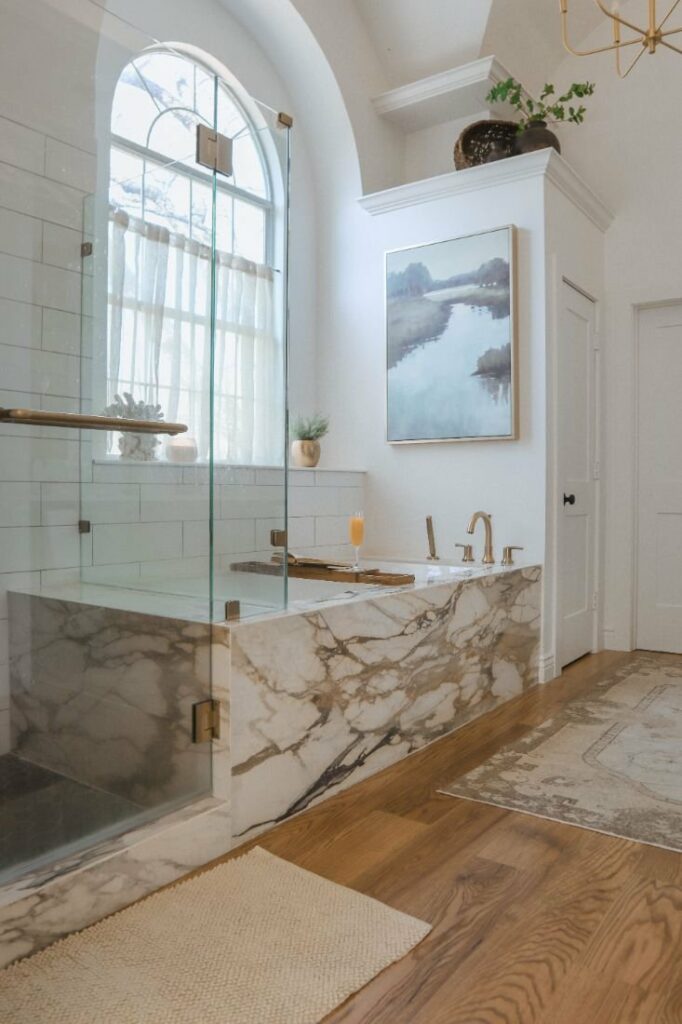
The room needed a focal point and we chose to make the tub the feature. We carried the heavy vein porcelain through to the shower for the bench and used it in the shower curb as well. Porcelain is becoming more popular and comes from all over the world.
We chose this DalTile piece from Italy for the rich warm colors. The honey brown ties in with the our wood floors and the light to charcoal gray ties into the vanity and shower accent wall. Sometimes the safe choice is boring. If you love something, don’t be afraid to go bold!
SHOP THE BATHROOM

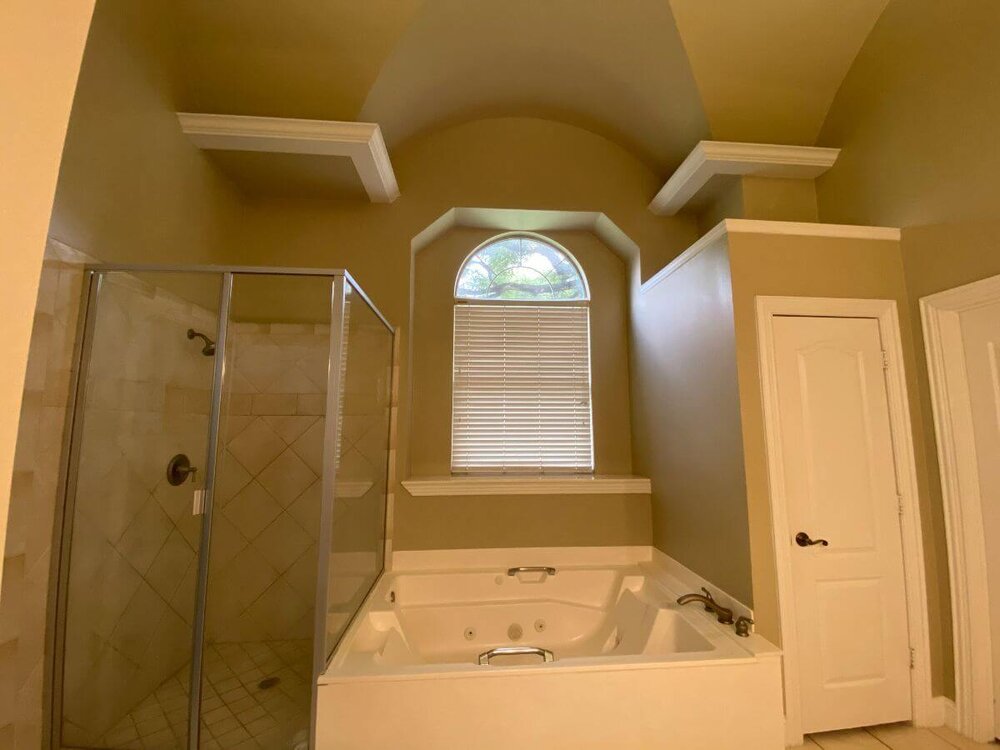
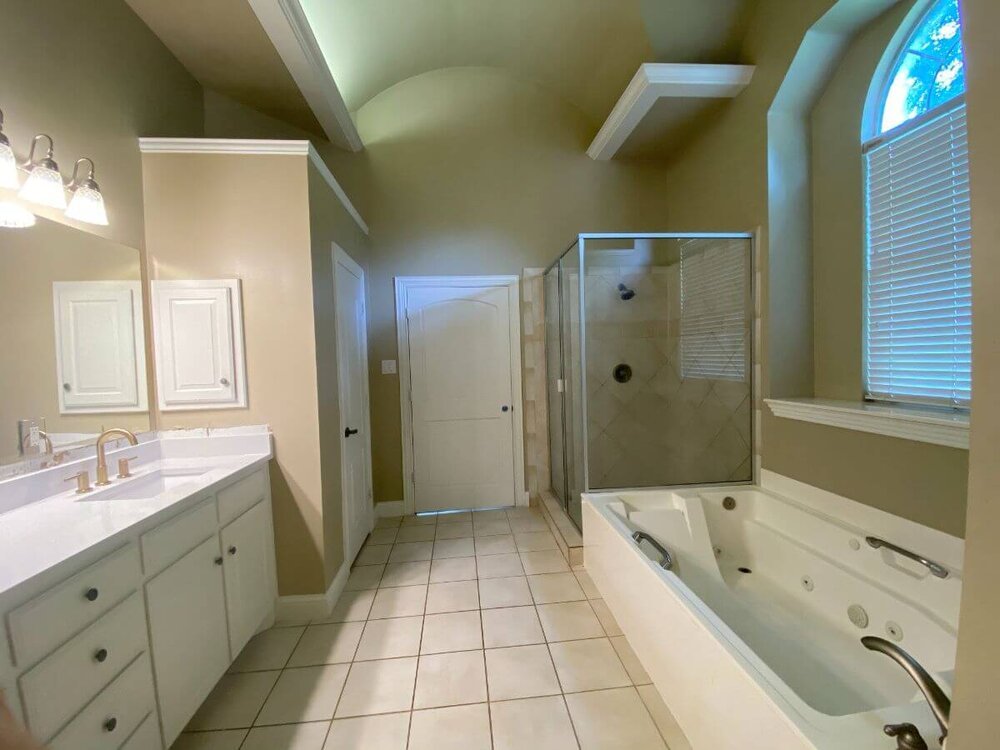
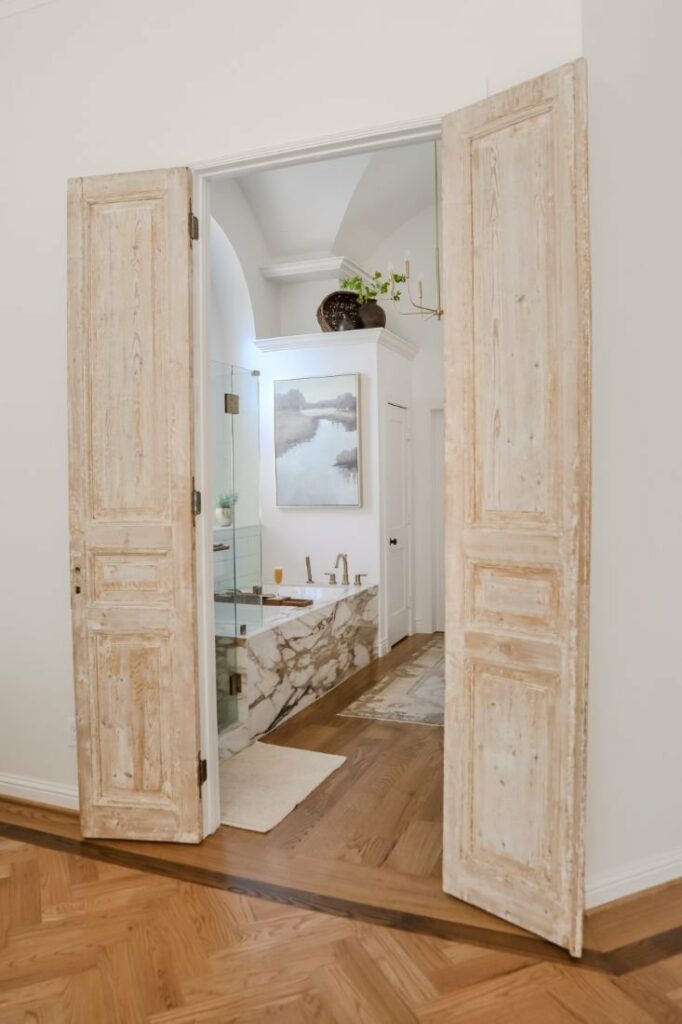
3. What’s Strange Could Be Character
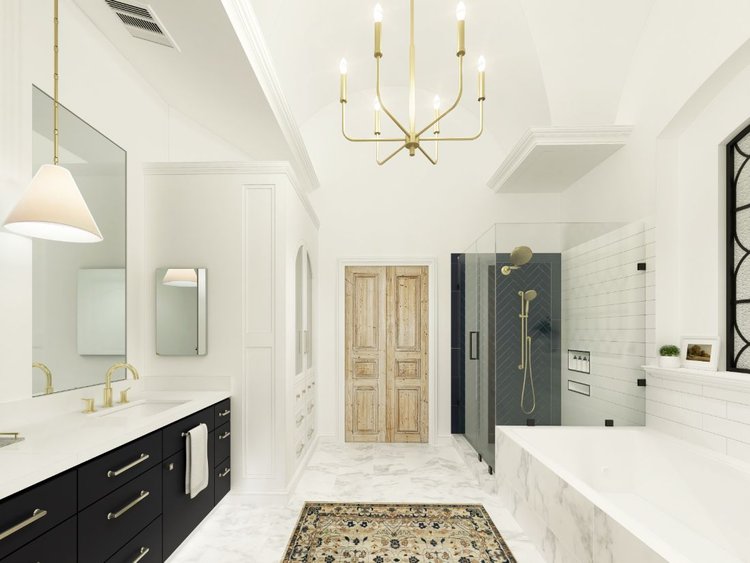
There were too many lines in the ceiling. Strange fur downs, ledges and a very ugly linen closet door where you entered the room. Above the arched window was a weird eyebrow. Rather than take out these features we decided to lean into them.
BATHROOM BEFORE
We gave the walls, trim and fur down a coat of white paint to make the weird lines disappear. We made the eyebrow an arch to follow the same lines as the window. We hung pendants from the fur down to make it feel intentional and created a linen cabinet in place of the linen closet. We also hung a chandelier from the point where the curves met in the center of the room. We accessorized the ledge above the water closet with a French vintage fruit basket and wooden vases. Now the weird features are character rich and beautiful!

4. Some Splurges are Worth It
Our slab of porcelain was $1500 dollars. Because the material is being widely used more stone contractors are investing in proper tools to fabricate it. However, it’s a very thin material and takes precision and skill to cut. The labor for fabrication varies but currently its higher price than your average stone. We paid $1800 dollars for the labor and install. So total cost was $3300 dollars. We splurged here for the impact and looked for other places to save.
5. Add Niches to the Shower
Our niche is perfect for us. The tall part holds our shampoo. The short shelf is perfect for a bar of soap or razors. Niches are functional but can also be a design feature. In this case, we just used the same white tile as the wall to let the tub be the star of the show!
6. Include a Bench in the Shower
Benches are not only pretty but they are highly functional. The standard height is 17 to 20 inches high. But, like the niche, this is something you can personalize as well. If you’re tall you can make it taller. If you’re shorter like me you can make it shorter. I like to use the bench to shave my legs. So a good rule of thumb for me is where would my foot easily rest! 😂
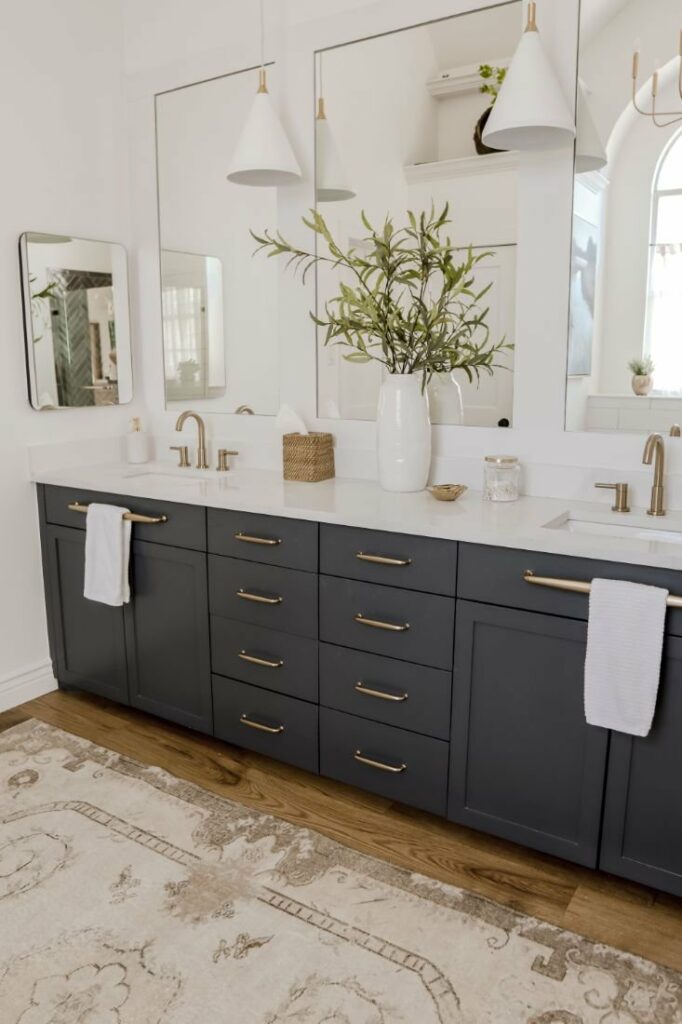
7. Save by Replacing Doors on Vanity Rather than Completely New Cabinets
If your cabinet boxes are in good shape you can reuse them. If they’re made of particle board and rotting then rip them out. If they’re solid wood, even if they’re dirty you can reuse them. A good coat of paint will fix that! We used the boxes in this remodel and updated the doors.

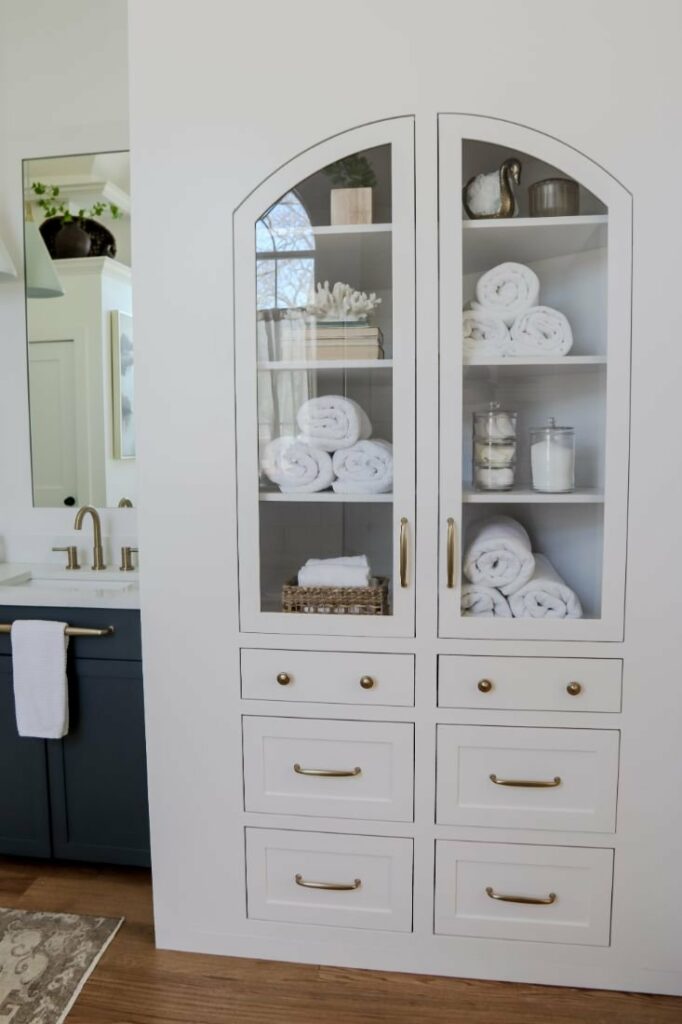
8. Add a Linen Cabinet
We are huge fans of linen cabinets in place of dated linen closets. Anytime we can eliminate a door and replace it with something pretty we like to do that. The linen cabinet is not only pretty but functional as well!
9. Incorporate as Much Storage as Possible
The bathroom had medicine cabinets on either side of the vanity. We actually use them to store vitamins as well as our lotions, shaving cream, etc. So its a very functional storage space for us. Drawers are better to store blowdryers and hot irons, they make it just easier to access than a cabinet below the sink. When we plan a space we think of all the items we use daily and then decide the best way to store them for easy access and function.
Towels in the linen cabinet, and hooks placed just outside the shower for ease. If you have a shower door make sure it swings open the right way allowing you to grab your towel from inside the shower. We have shower handles that also function for our wash clothes. A place for everything and everything in its place!
10. It’s Worth the Wait
I’m so thankful for our new bathroom. We lived with moldy shower caulk, a shower door handle that constantly fell off, a tub that didn’t function, along with a dated, and funky bathroom for a long time. I think the wait along with the disfunction helped us really appreciate our new bathroom more. All the time, the money and the planning it took, it was definitely worth the wait!
I can’t wait to hear what you think in the comments. I’d also love to hear if you have any tips you have from updating your bathrooms!