How to Create an Interior Design 3d Rendering
When taking on the significant investment of a renovation, confidence in your design choices is key. Visualizing the intended outcome of your revamped space can greatly aid in this assurance.
Today, I’m excited to walk you through the process of obtaining a photorealistic 3D rendering for your room design.
Now, let me be transparent upfront: I’m not the wizard behind crafting these stunning images. I outsource this task! However, I’ve honed a method to ensure a smooth process for my rendering artists, guaranteeing we capture every detail we desire.
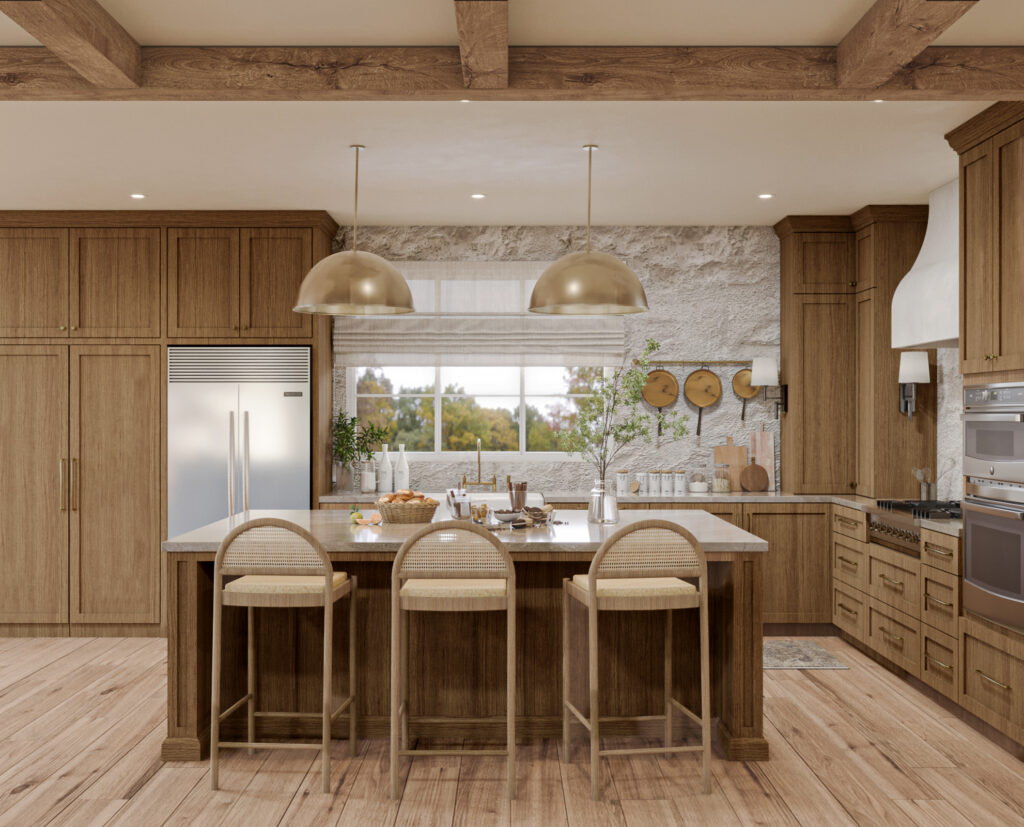
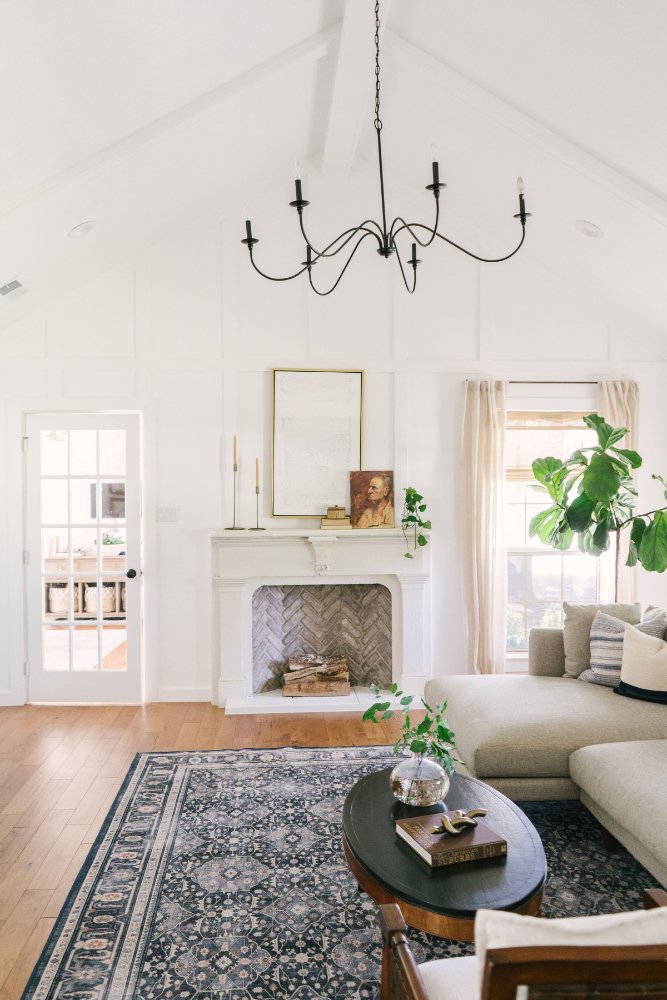
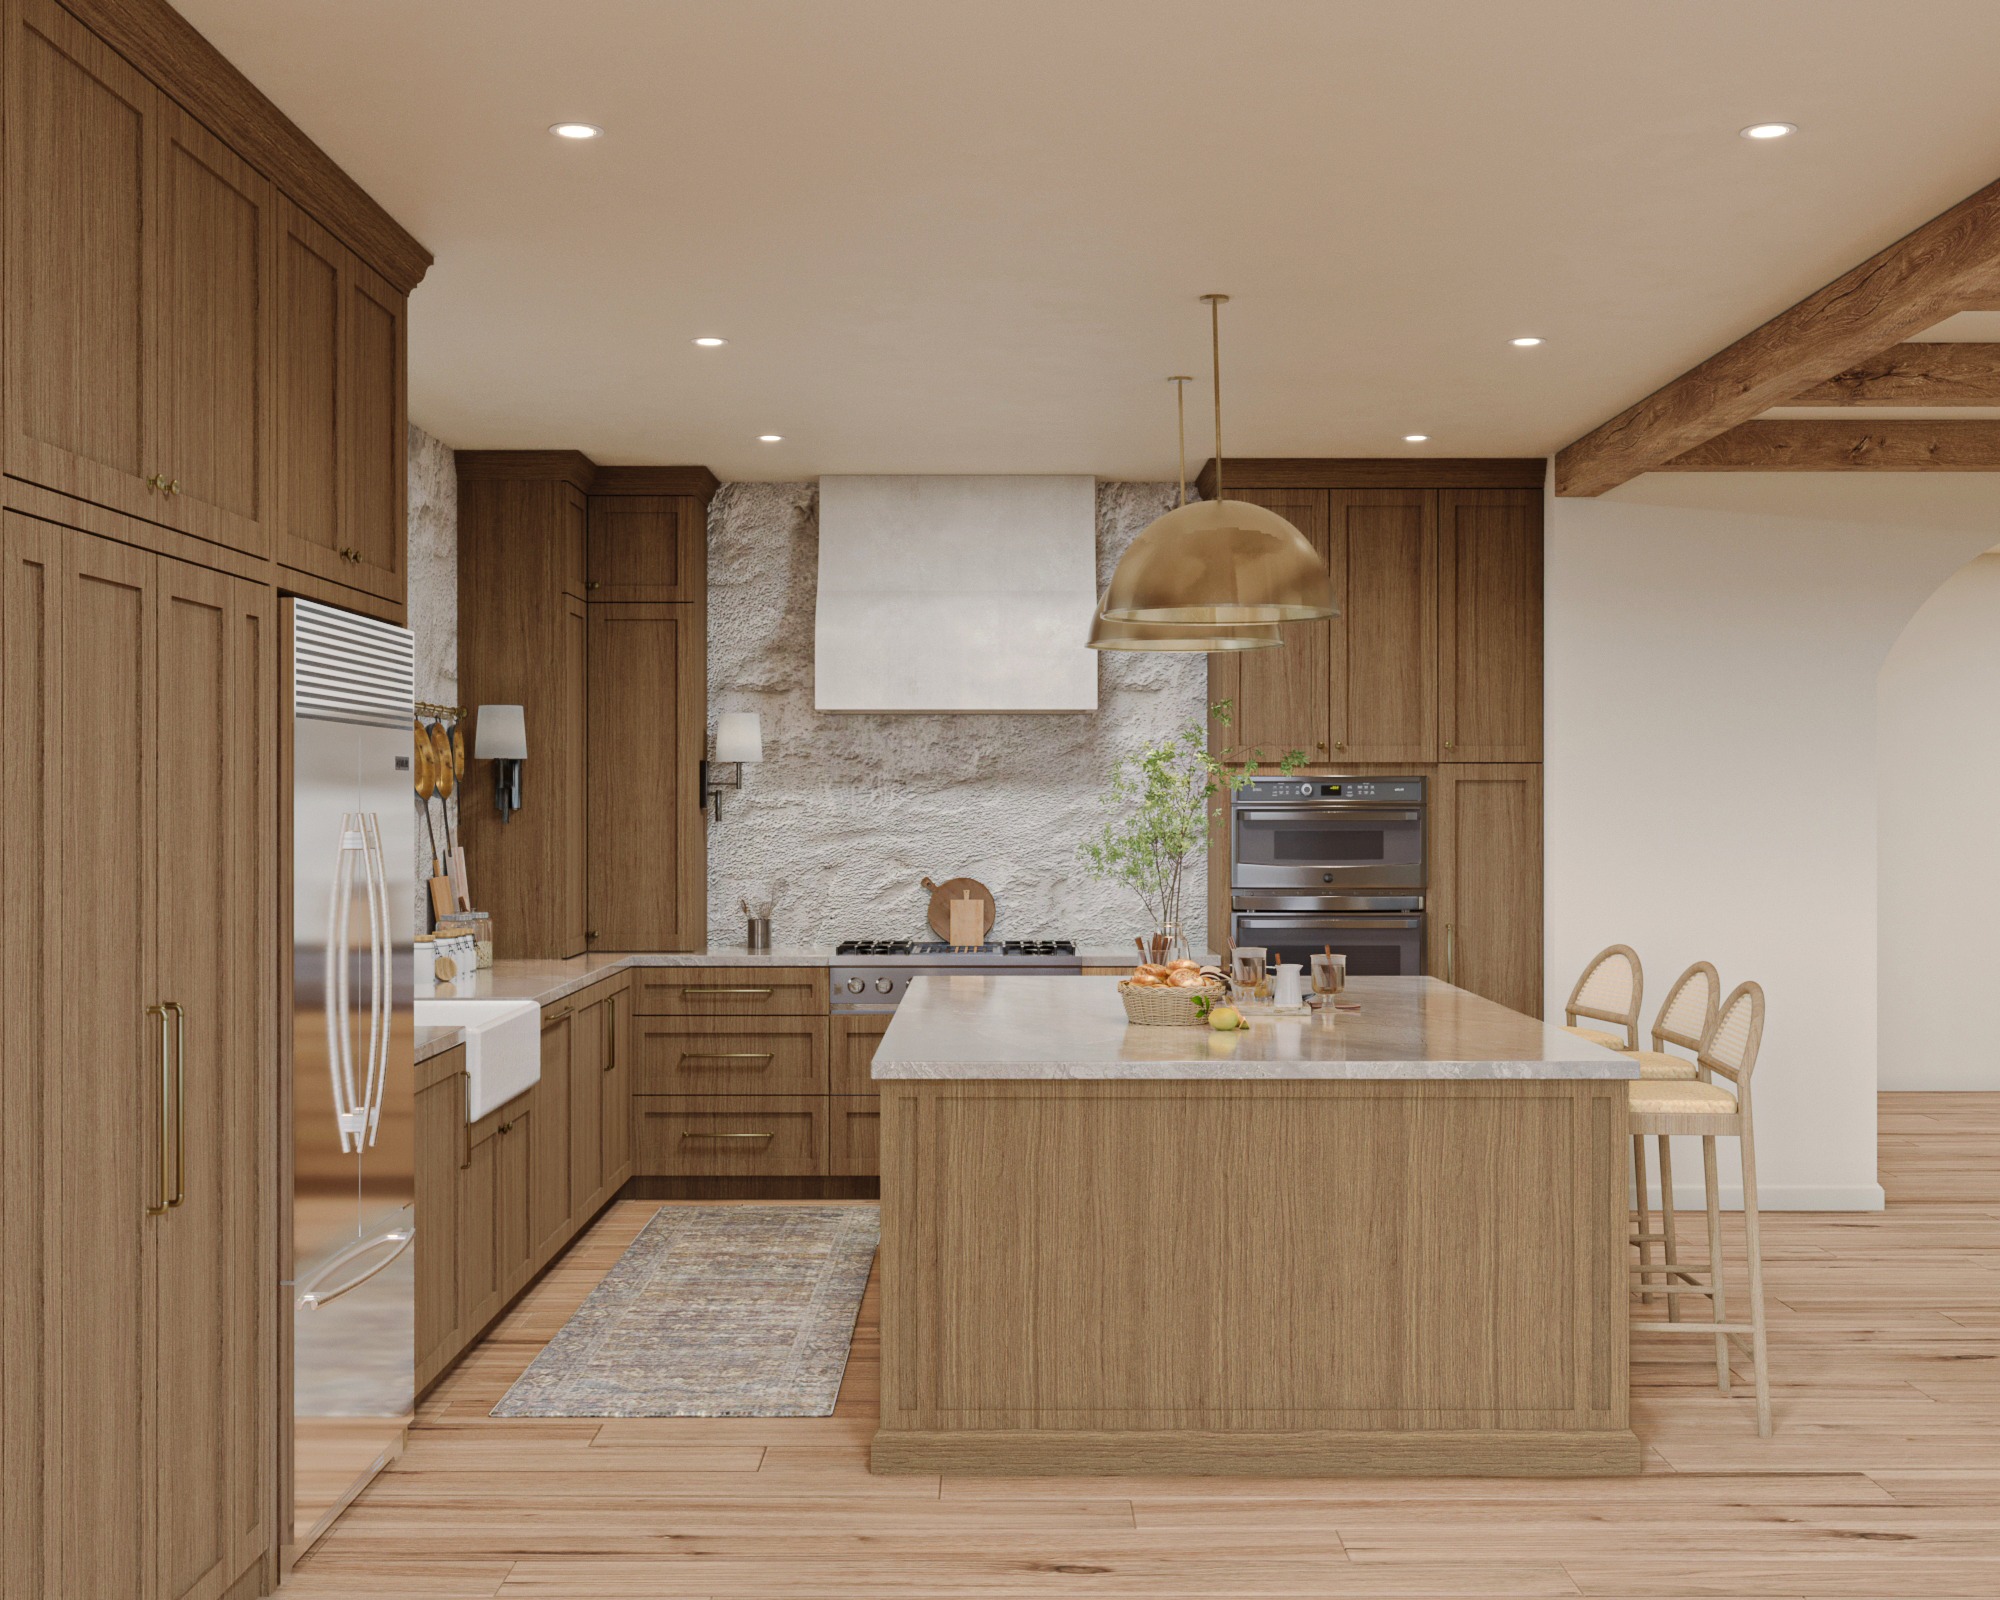
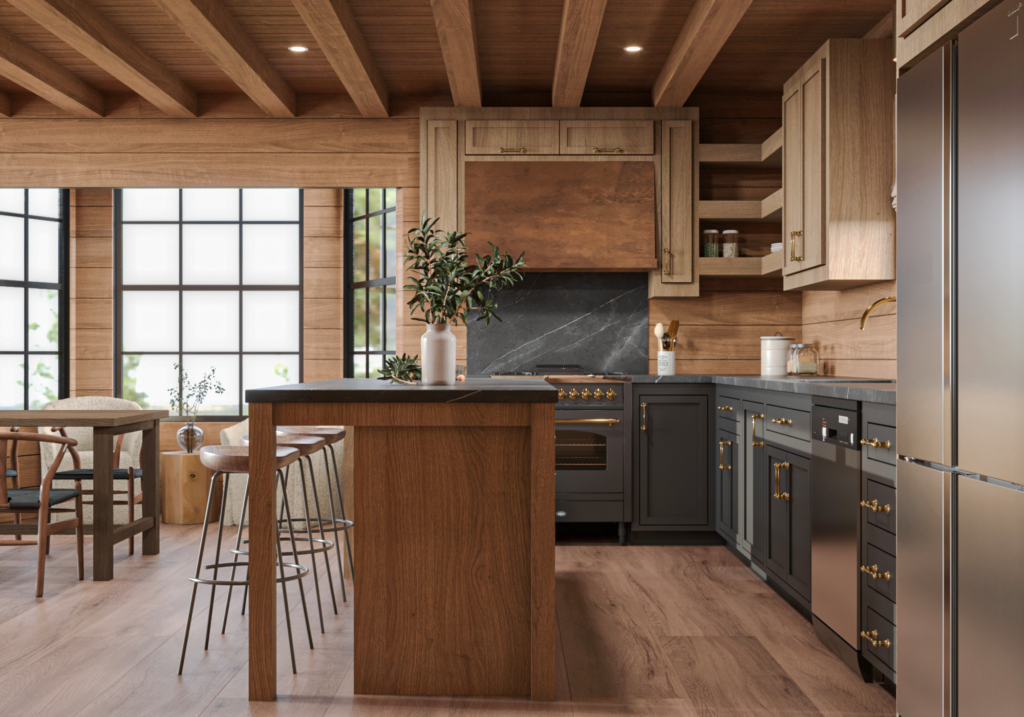
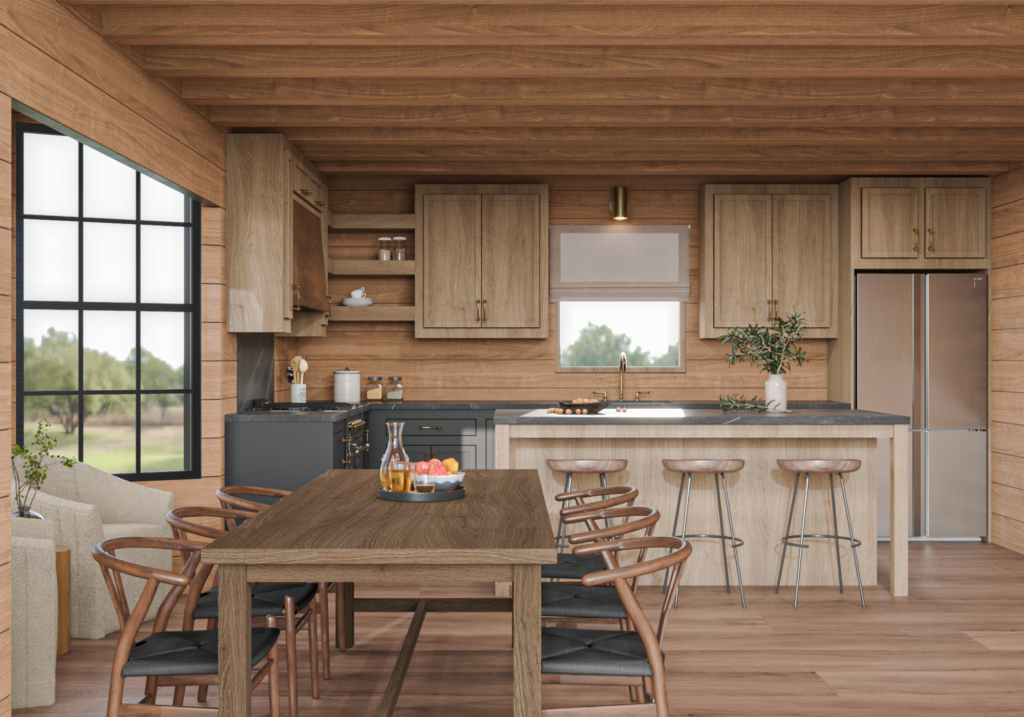
Scroll down to the end of this blog post to see the 3d renderings for our cabin project!
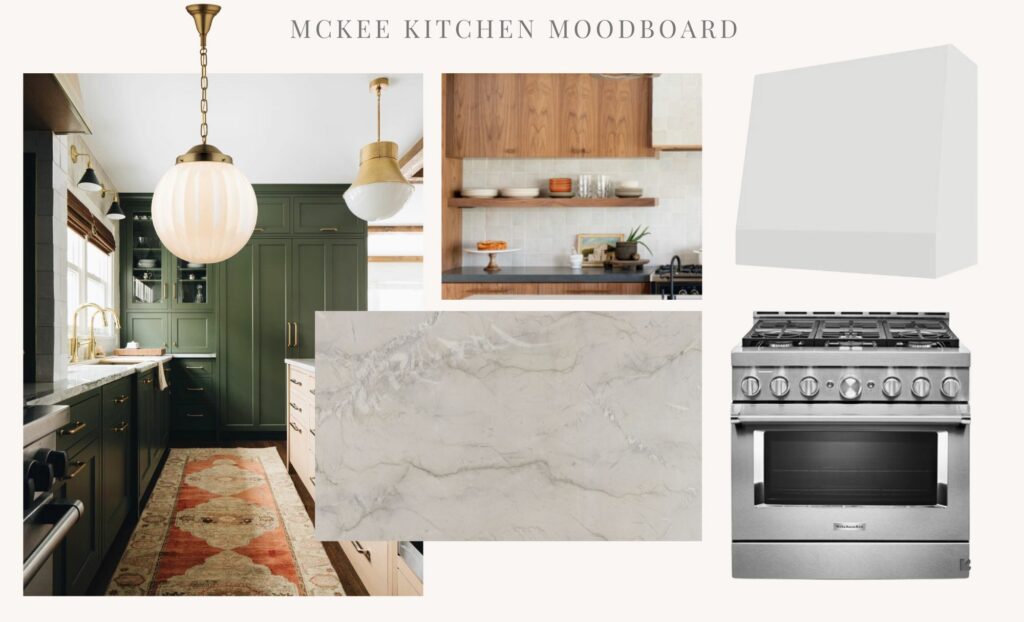
STEP 1: CREATE YOUR MOOD BOARD
To kick things off, I rely on a handy site called Canva. It’s user-friendly, even my mom—who’s not exactly tech-savvy—is now a fan. Here, I gather all the elements intended for my space: lighting fixtures, furniture selections, flooring samples, built-ins, and more. Having them consolidated in one place allows me to be sure they’re cohesive before taking on the next step.
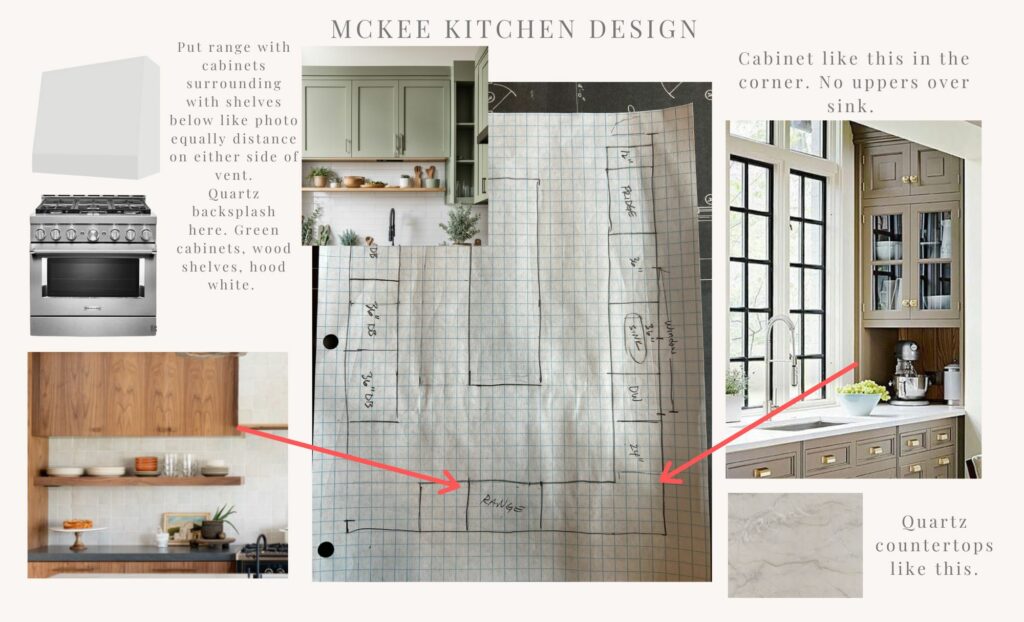
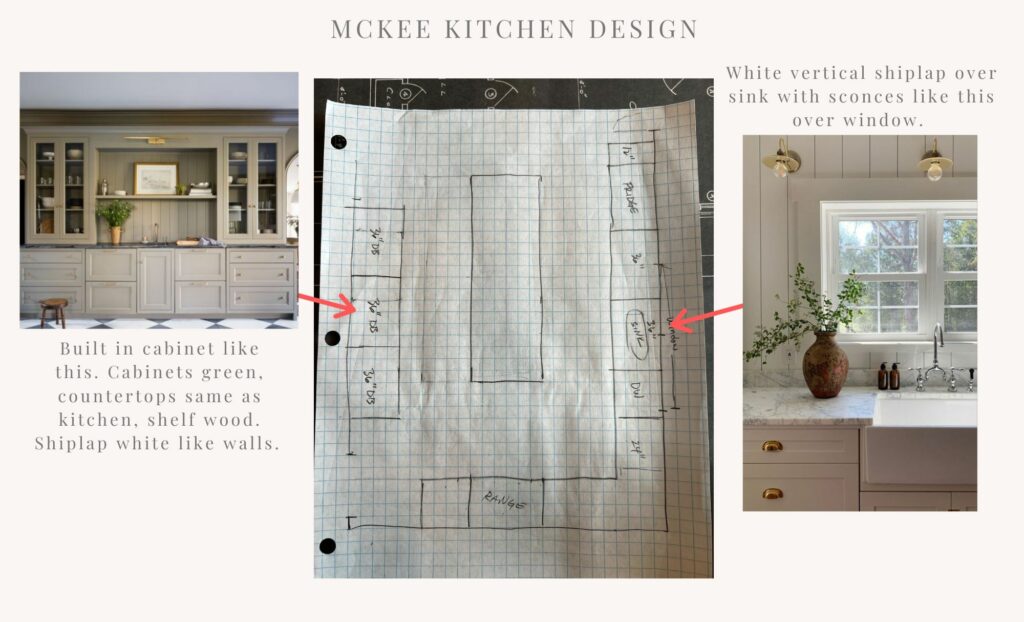
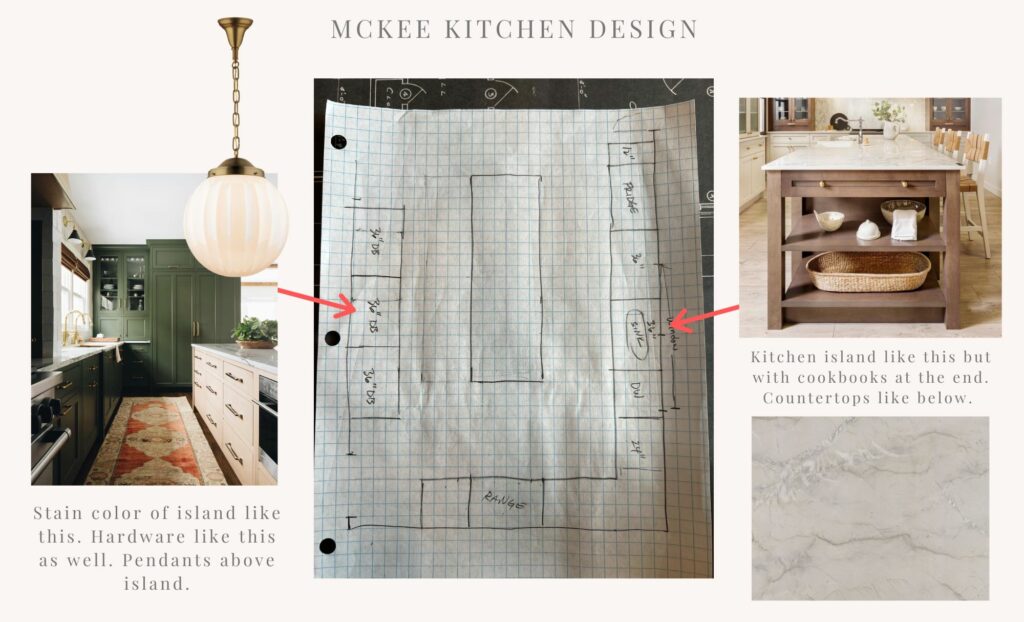
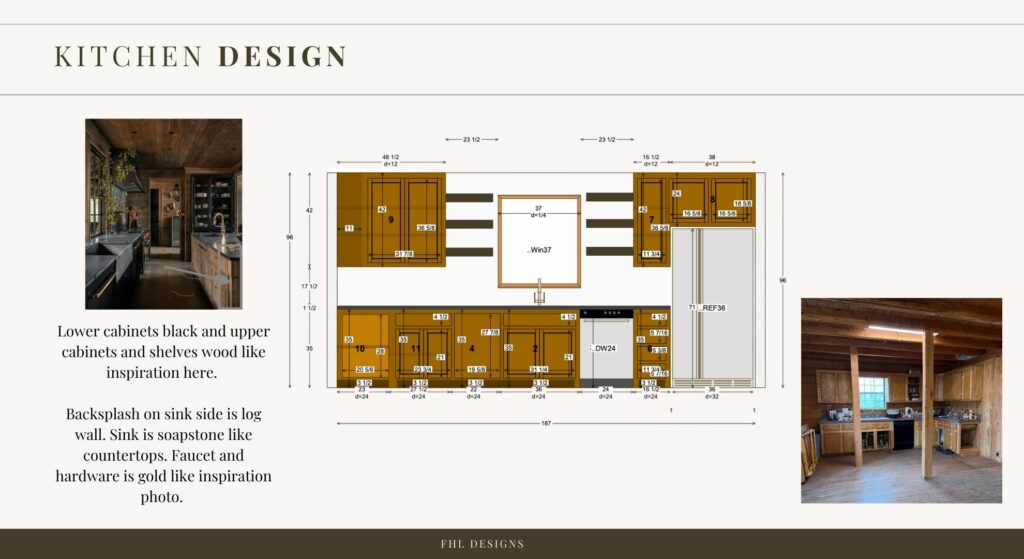
Here’s the Mood board for the cabin kitchen
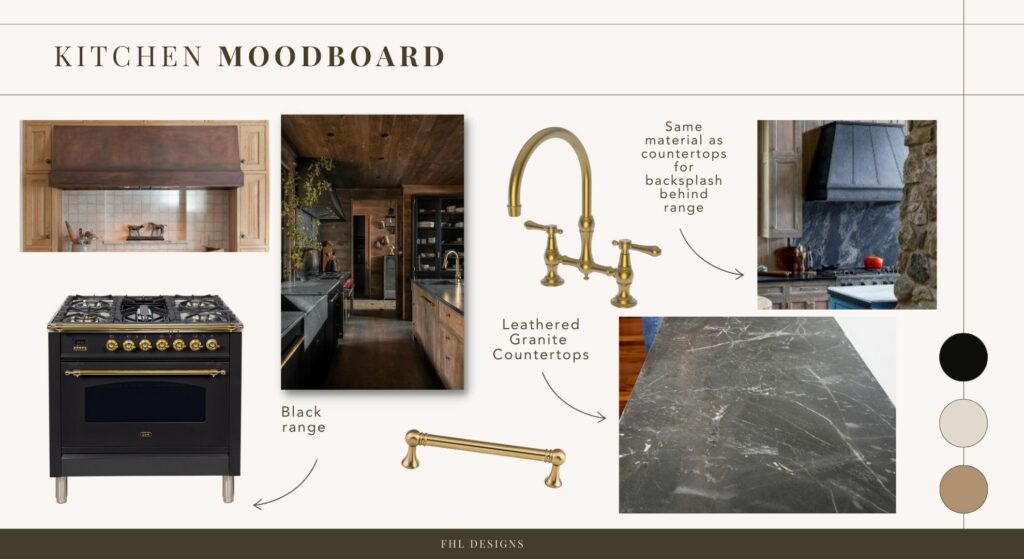
Here’s a mood board for another kitchen project we took on recently. There’s no set rules on how this is done, but just generally screenshotting the elements you’ll be using in the design and putting them on the board.
We have mood board templates here!
STEP 2: COMBINE YOUR INSPIRATION PHOTOS & YOUR LAYOUT
Next up, we blend our inspiration photos with the layout of the room. If it’s a new build, I leverage the architect’s floor plan. However, for renovations, I sketch out the dimensions on paper. Admittedly, my sketches might not be to scale, but they provide a rough outline of the space’s dimensions. From there, the rendering artist can utilize their fancy software to ensure accuracy.
Here you can see the layout sketched down!
Here are the details for the cabin!
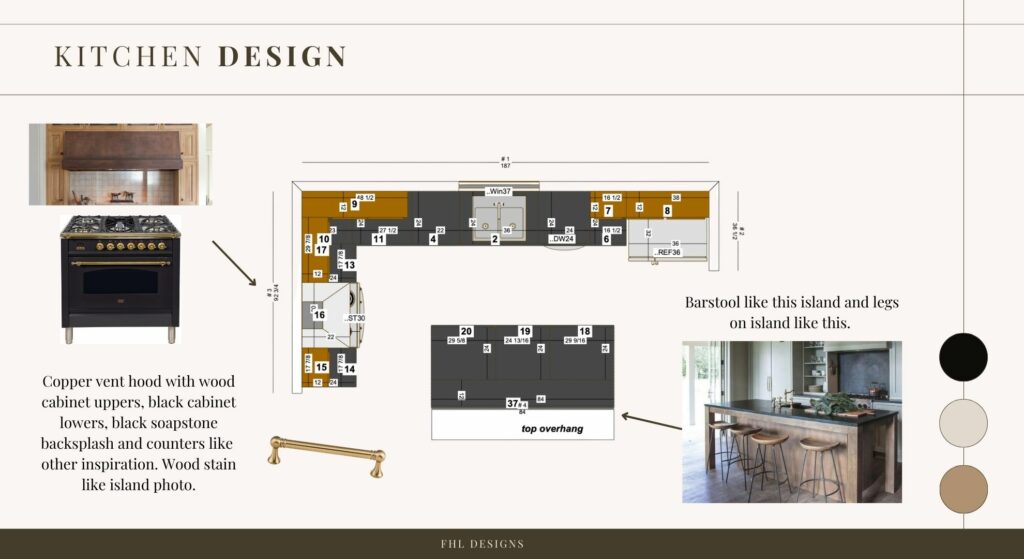
Here’s an example of a new build
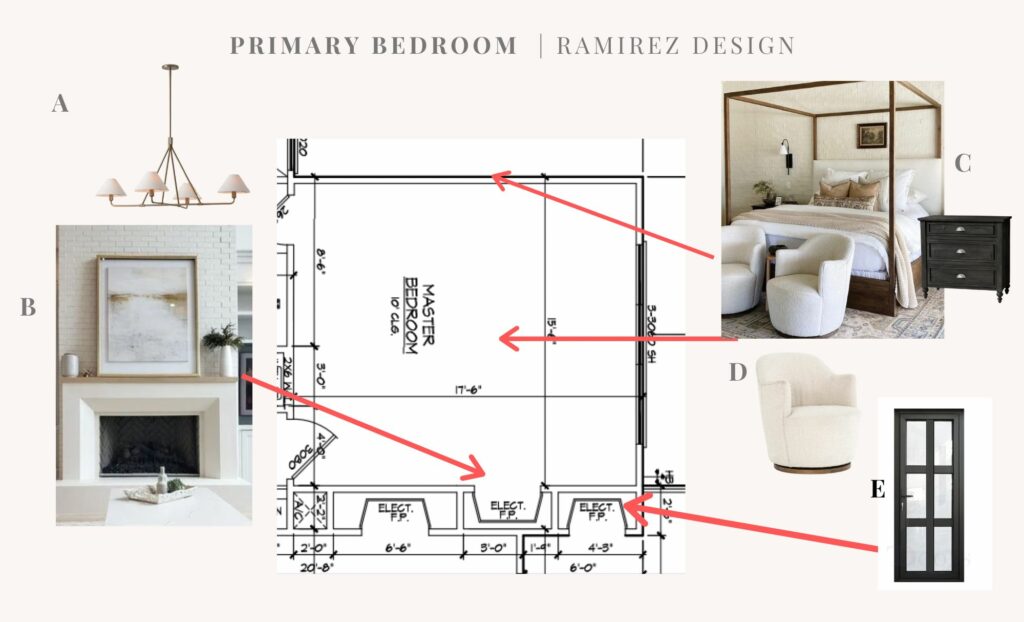
A – Add Chandelier B – This fireplace (same brick as back wall. C – This canopy bed with this chandelier and nightstands. D – Chairs in front of bed E – Add Door to Patio Here where other electric fireplace was.
STEP 3: SUBMIT YOUR INSTRUCTIONS TO YOUR RENDERING ARTIST
When I first started creating 3d renderings for design projects I used Fiverr. This is a great marketplace for outsourcing! On Fiverr when you go to the seller’s service listing you send a message requesting a quote. You do this even if they have the price listed. On average I’m noticing renderings are anywhere from $100-$300 for 2 views per a room and take about a week.
When I request the quote I attach the PDF that I made in Canva with the design details. From there they’ll use their software to generate the image. I typically have 1-2 revisions per rendering. Clear communication is key, ensuring the rendering artist understands the vision and nuances of the project.
And there you have it! By following these steps, you can embark on the journey of bringing your design vision to life in stunning 3D renderings.
Below I’m featuring more 3d renderings for the project’s we’ve taken on! If you want a 3d rendering but DON’T want the heavy burden of taking on the design choices, mom and I have a virtual design service and would love to help you design your dream home! Learn more here.
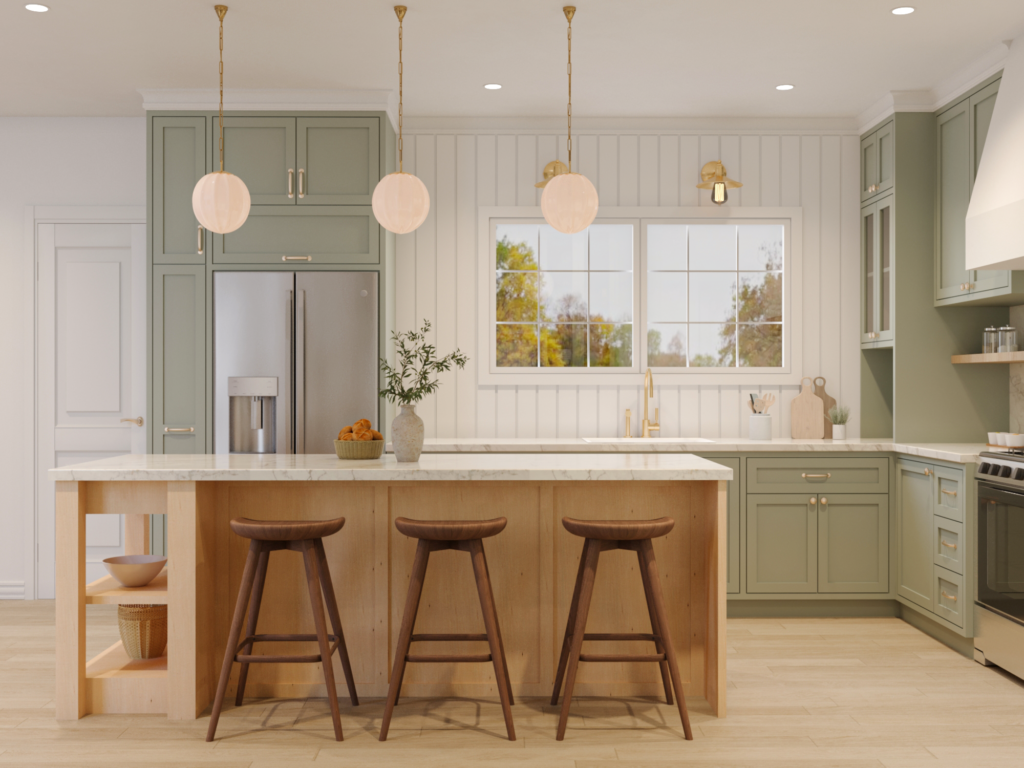
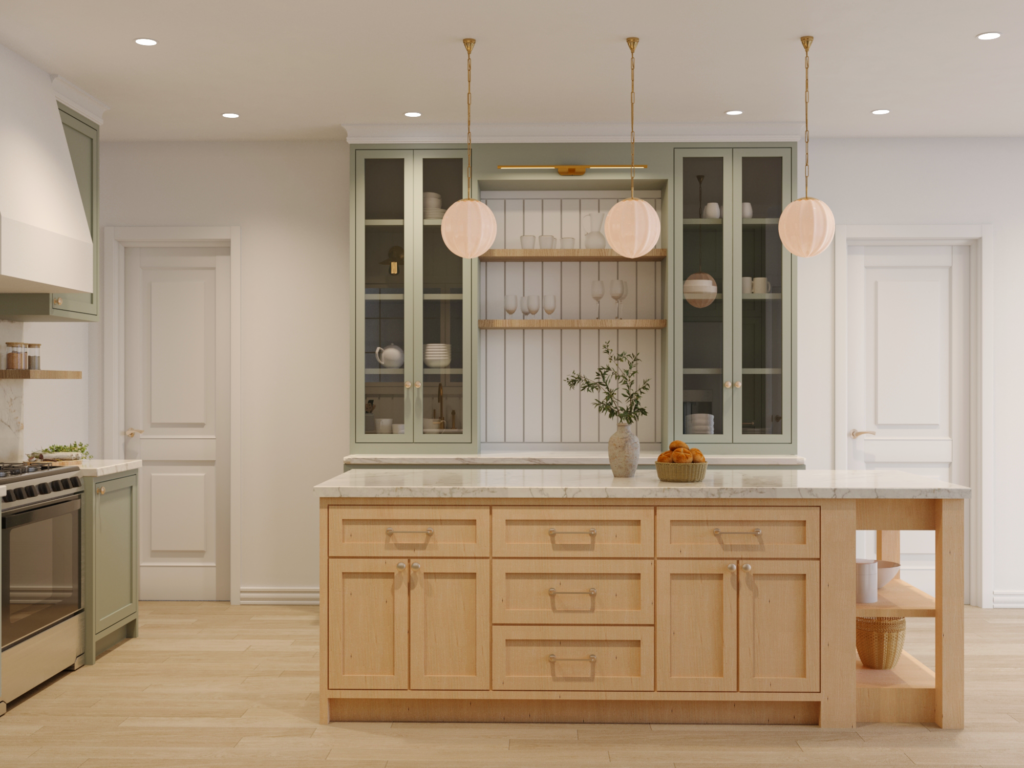
MODERN GREEN KITCHEN
EUROPEAN FARMHOUSE KITCHEN