
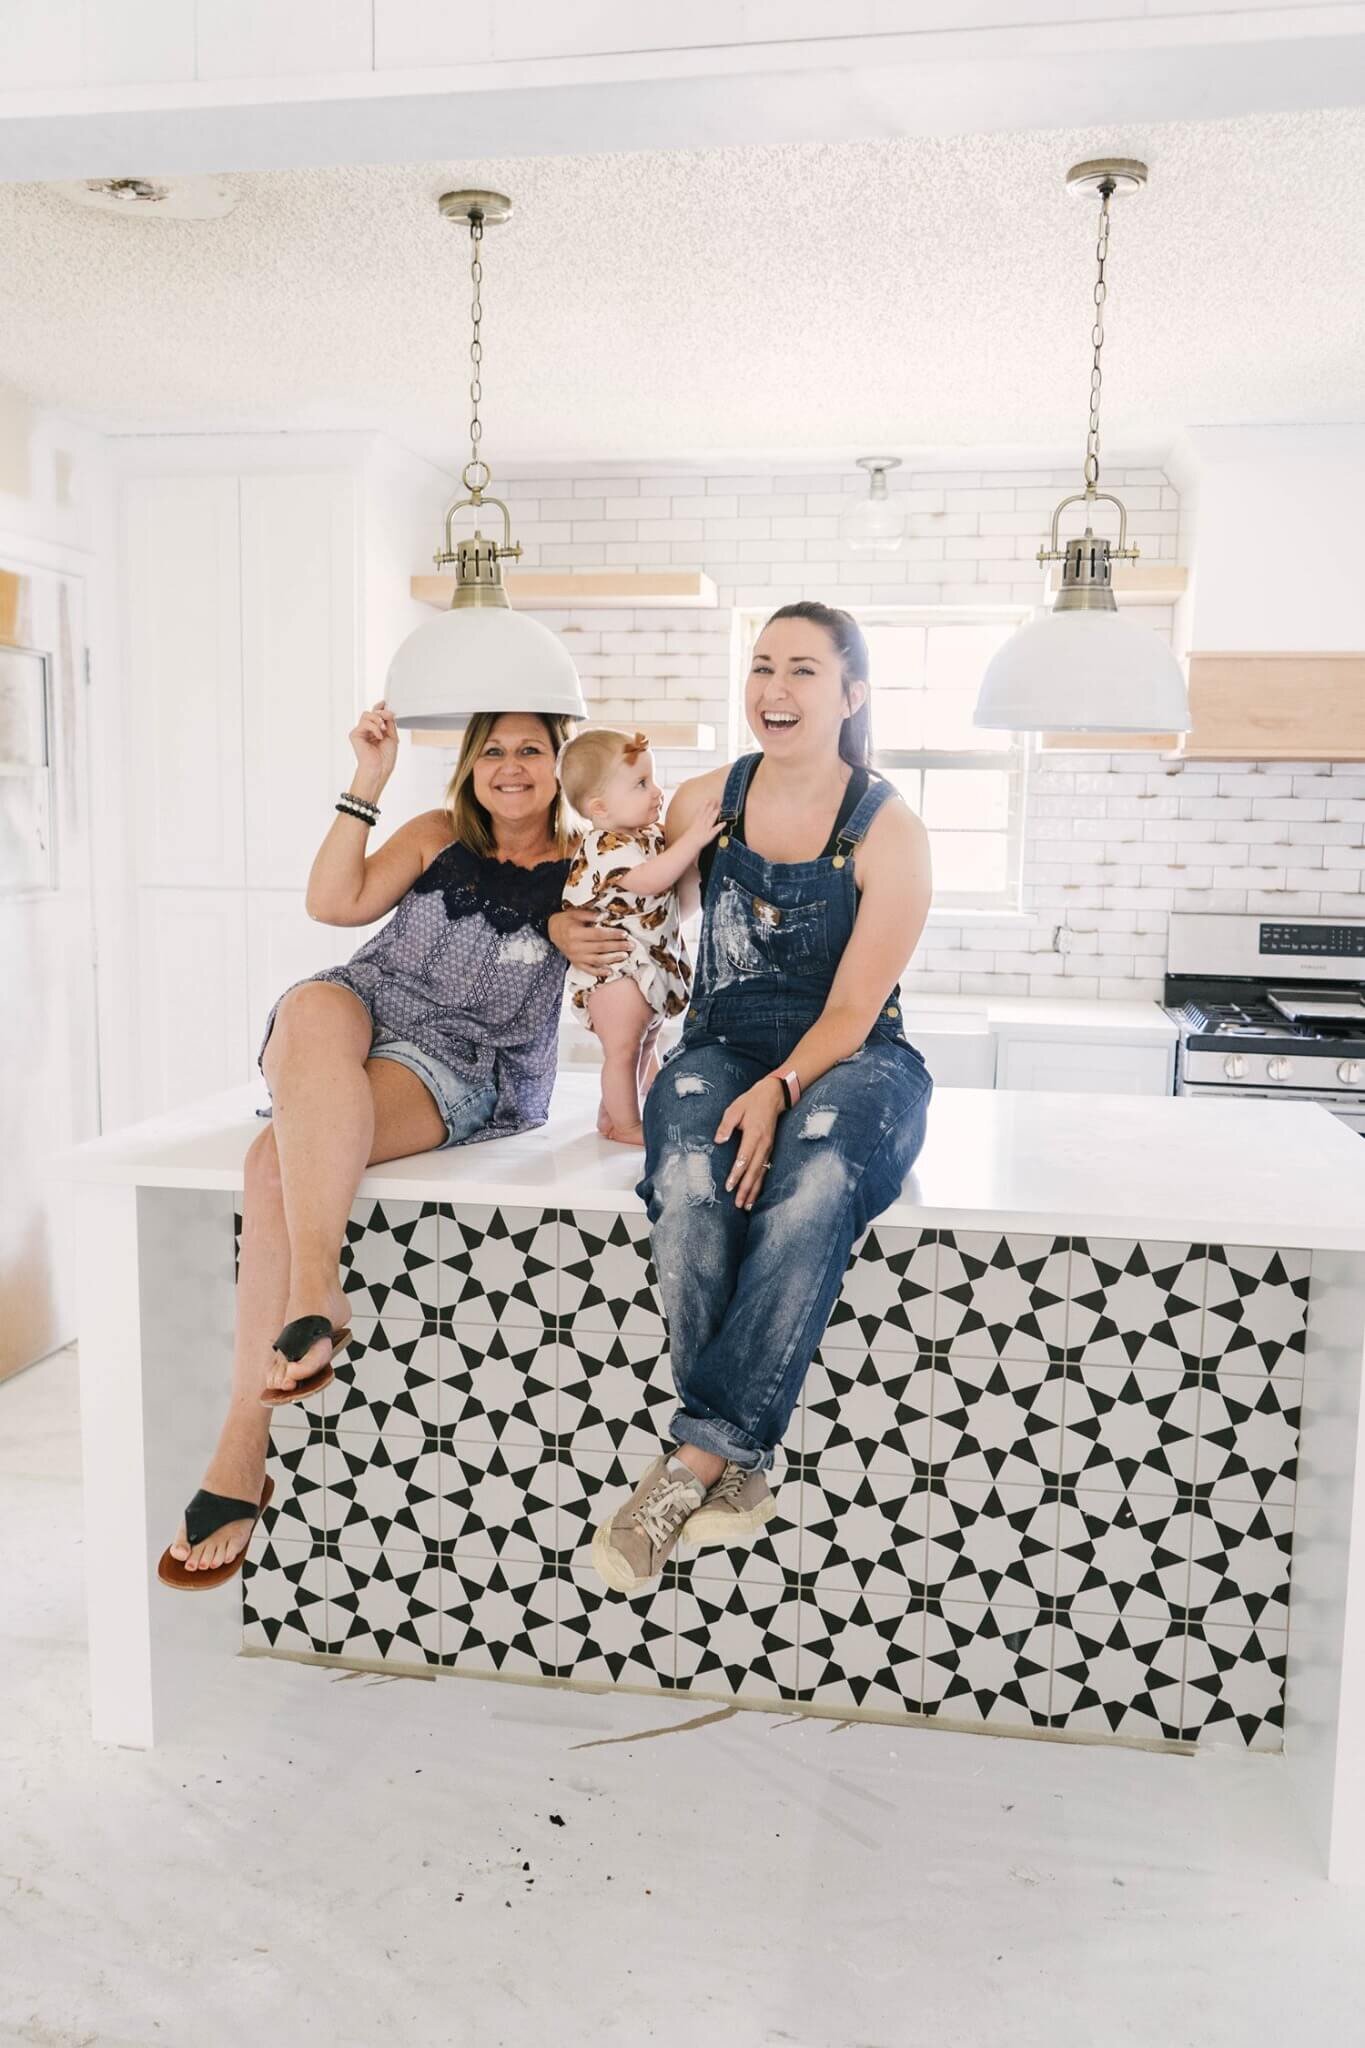
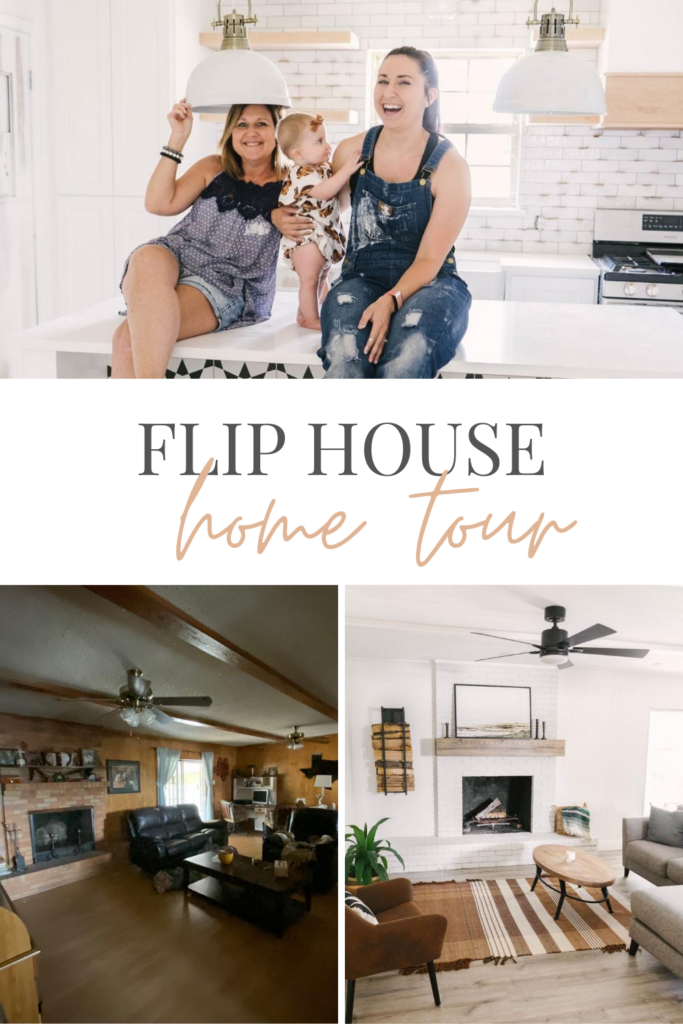
We Flipped a House – Our 1960’s Ranch Flip House
We flipped a house! It’s our first flip ever and we’ve so excited to give you a tour and our experience renovating it 💕 This house was a labor of love and we’re so excited for the memories to be made by the future family who purchases this beauty.
This home was actually my grandpa’s house. It sits on 1.5 acres and had so much potential on this gorgeous property. When he decided to move closer to us we saw a great opportunity to put a designer’s touch on this 1960’s ranch. In this tour, you’ll see before and after photos for each space and we’ve also included a video tour!
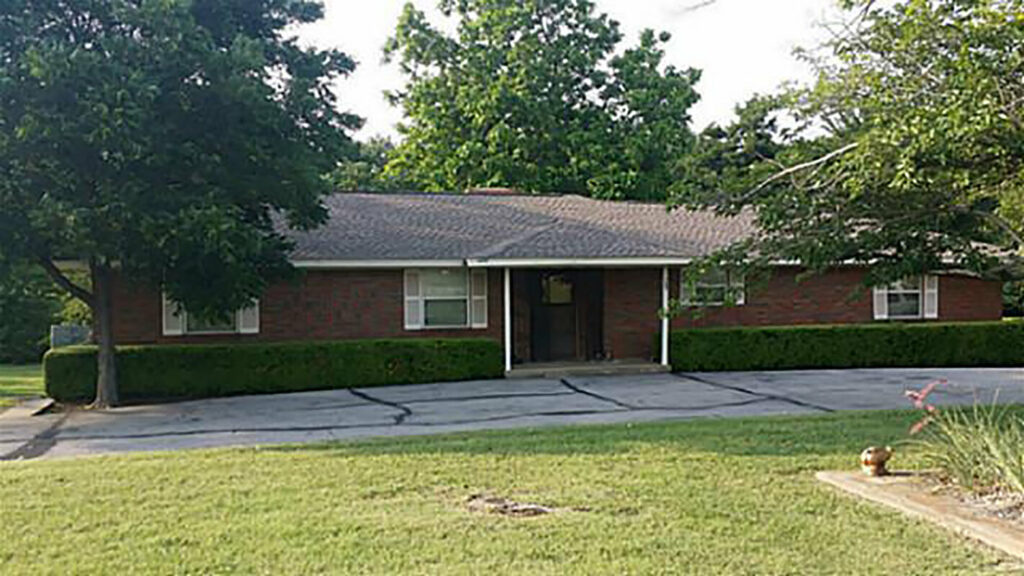
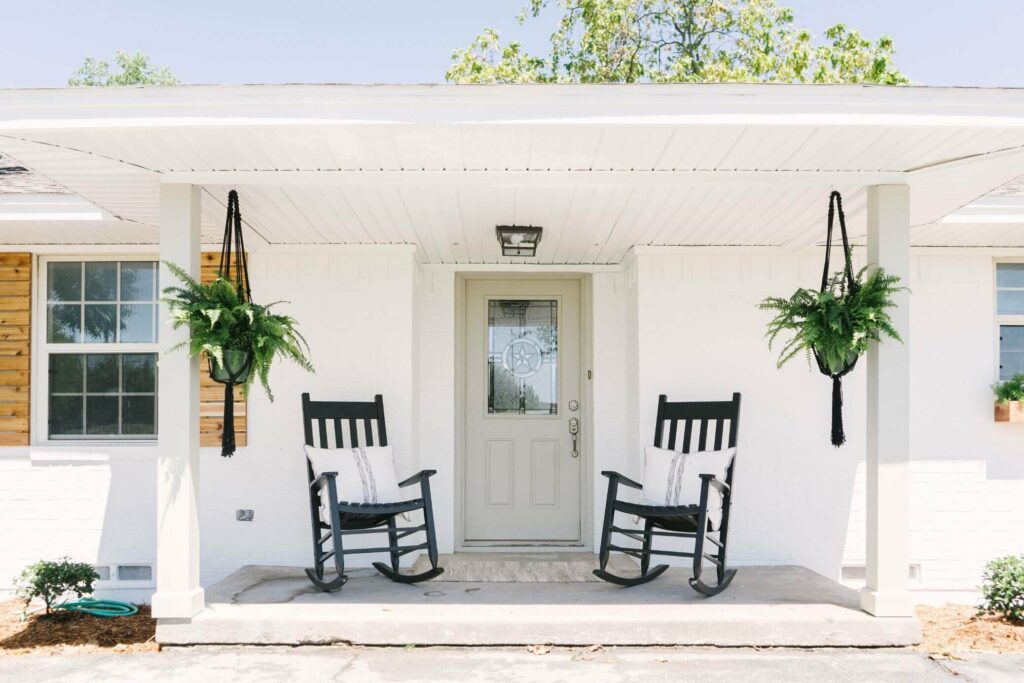
HOME EXTERIOR
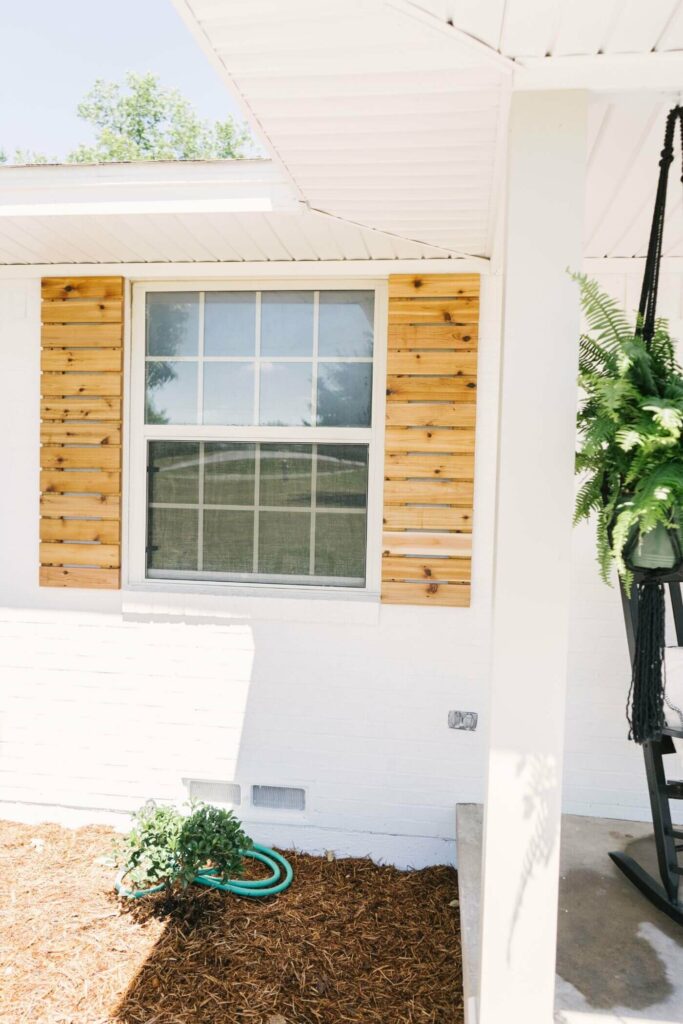
Let’s start with the exterior. In the before picture, you’ll see she held a lot of potential, but needed a facelift. We chose to paint the red brick exterior white and accented with a warm gray door. The exact paint colors are Sherwin Williams Pure White for the brick and Sherwin Williams Jogging path for the door and posts. We warmed it up with cedar shutters and a window box. These were built by a local talented woodworker, Cameron Nebe.
We chose to remove the overgrown boxwoods that didn’t show the house off well. We planted more low profile plants and hung ferns on the porch over the rocking chairs.
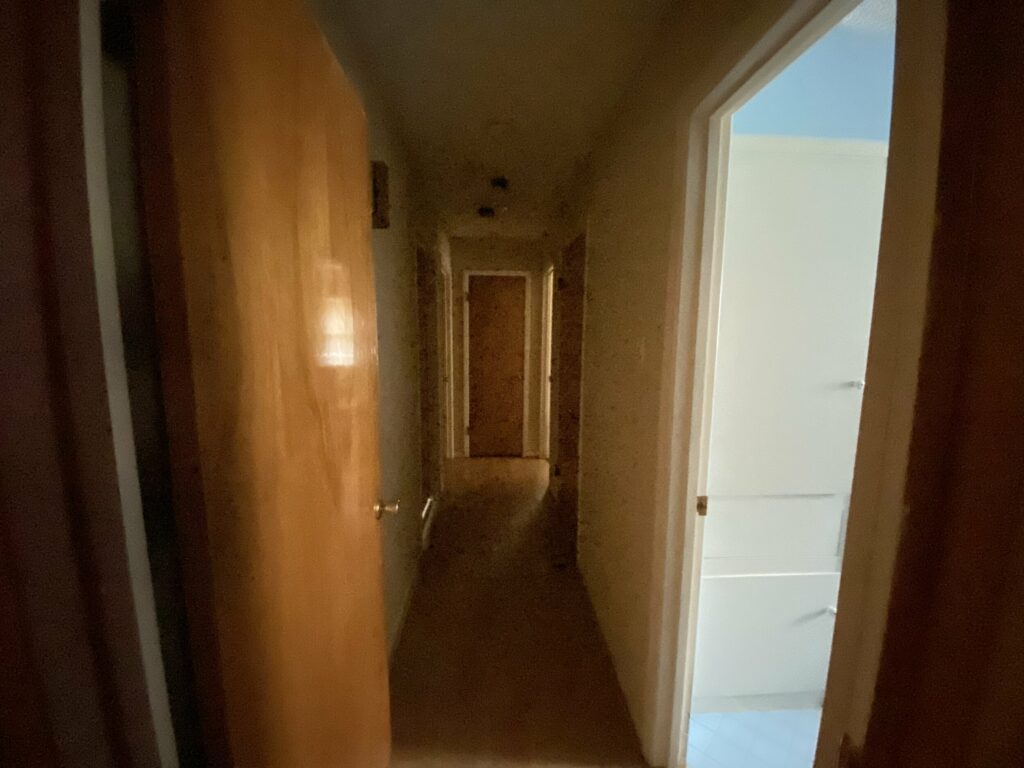
BEFORE
AFTER

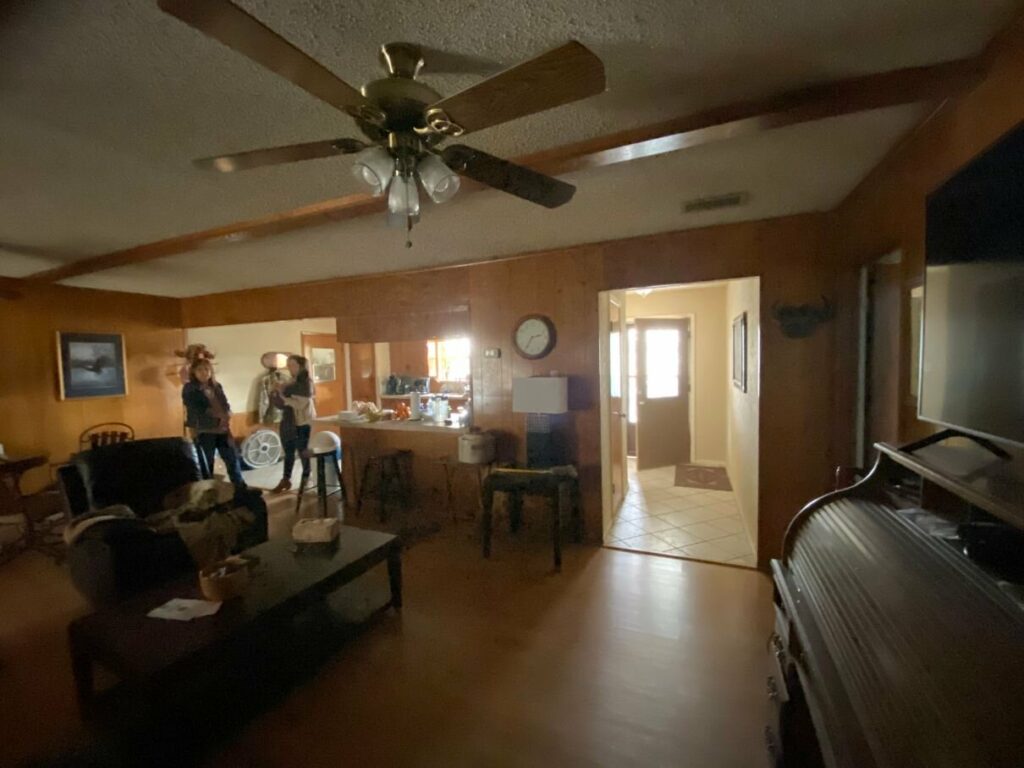
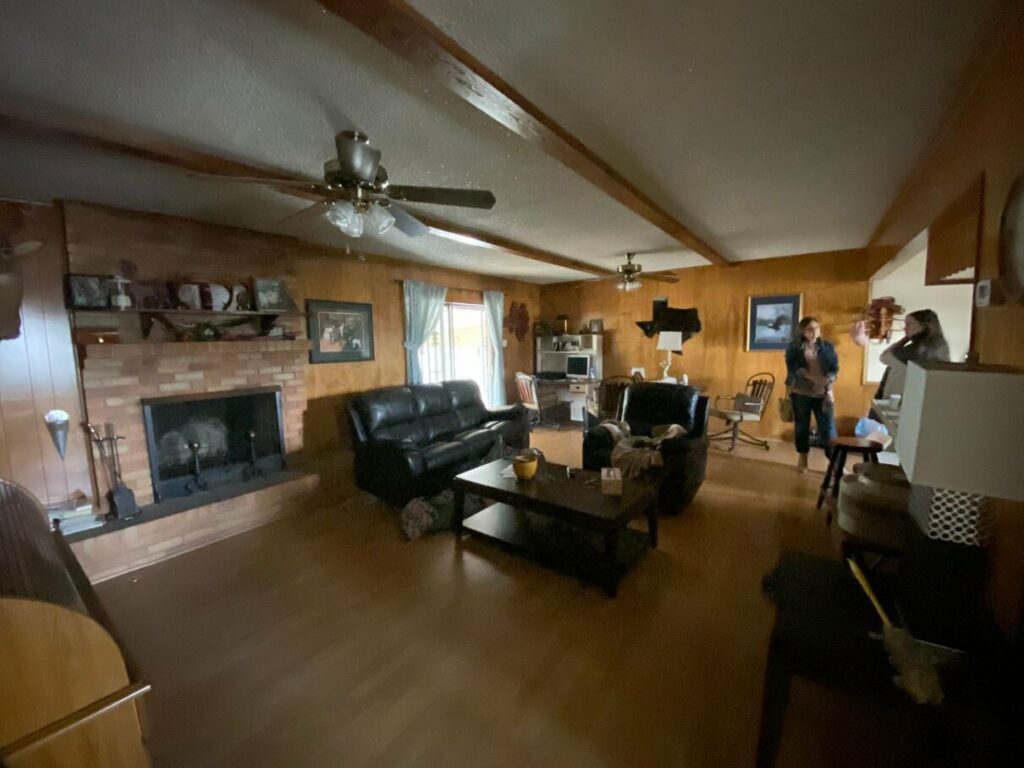
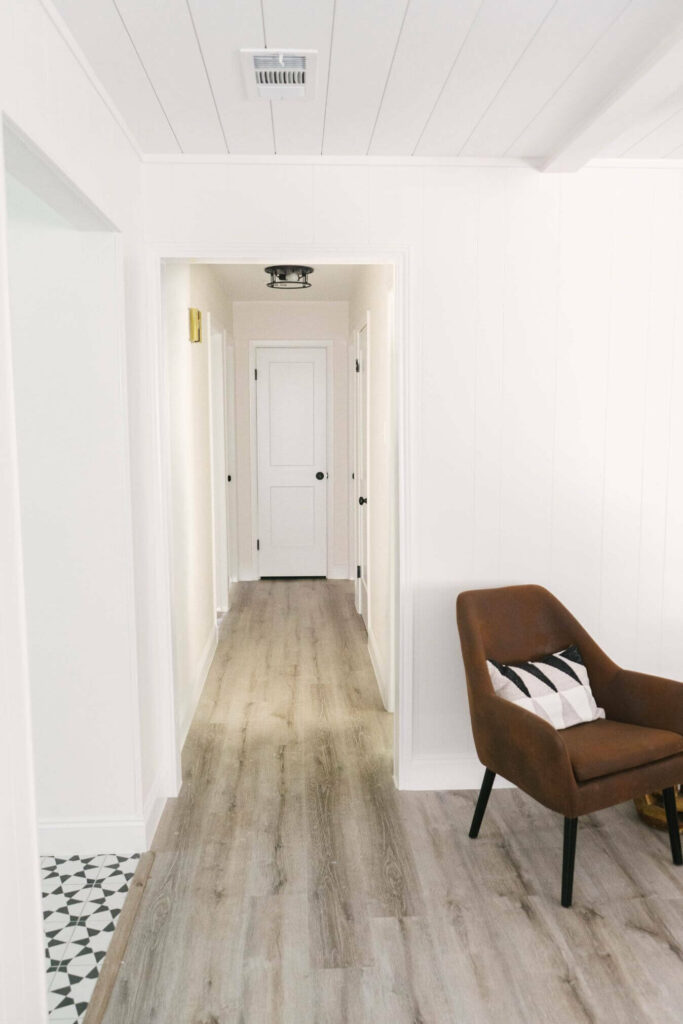
ENTRY & LIVING ROOM
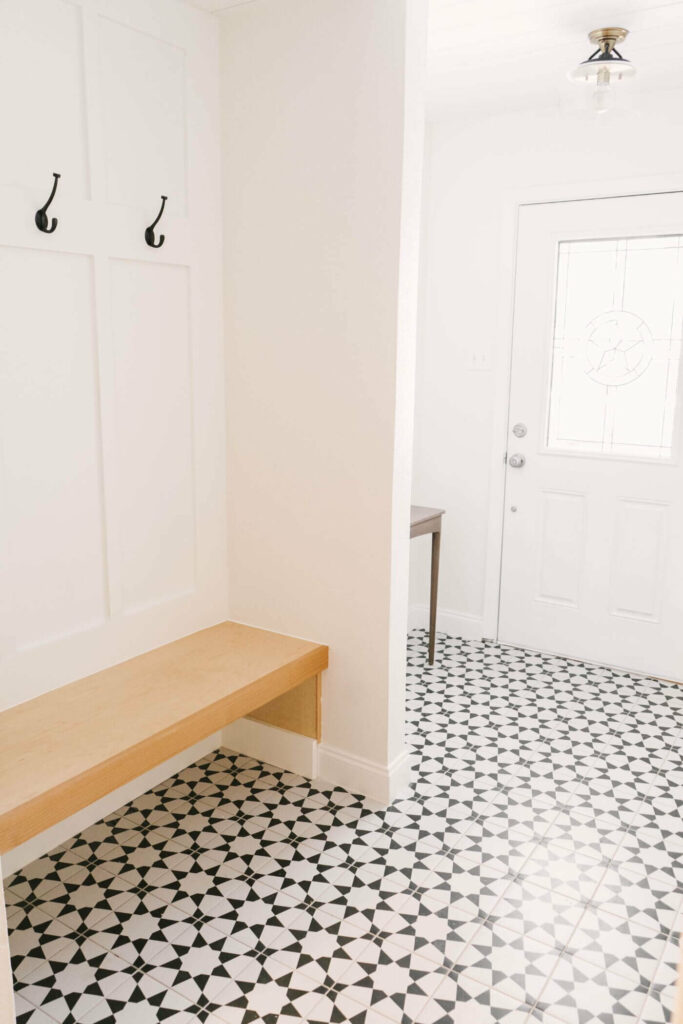
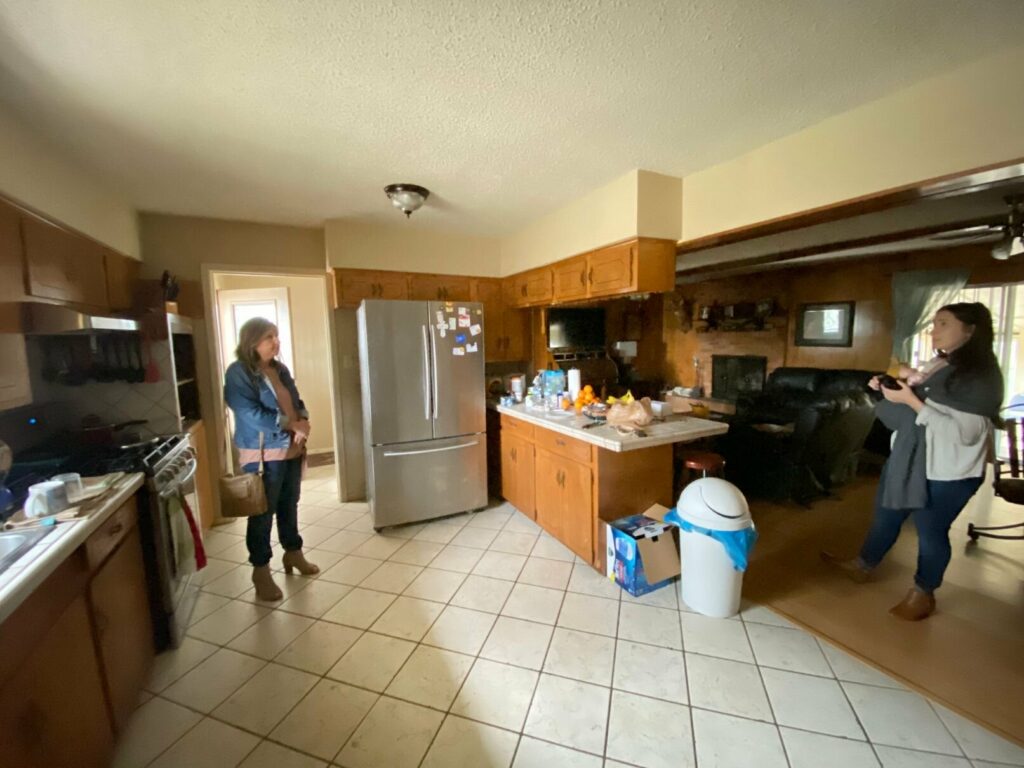
Next is the entry into the living room. The biggest issue in this room was really light. It was so dark and dated. Where the entry is there was a small case opening that led to the kitchen. In our video tour, you’ll see that mom wanted to open this all the way into the living room. The cabinet guy and I suggested to not only keep the wall but close it all the way up to allow for more cabinets and storage. After much back and forth she was convinced and this decision is what made this super cute entryway.
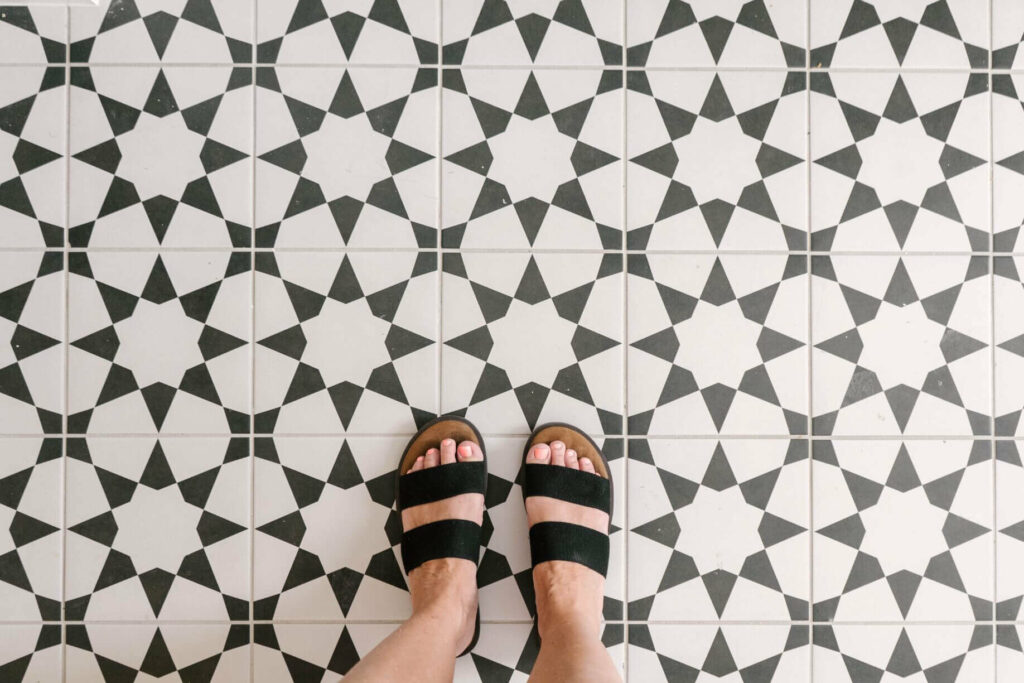
We made a statement with a bold modern tile and created a built-in to add even more function to the area. We removed a closet so it was important to add a drop spot for keys, bags, and shoes as the future homeowner walks into the home.
BEFORE
AFTER
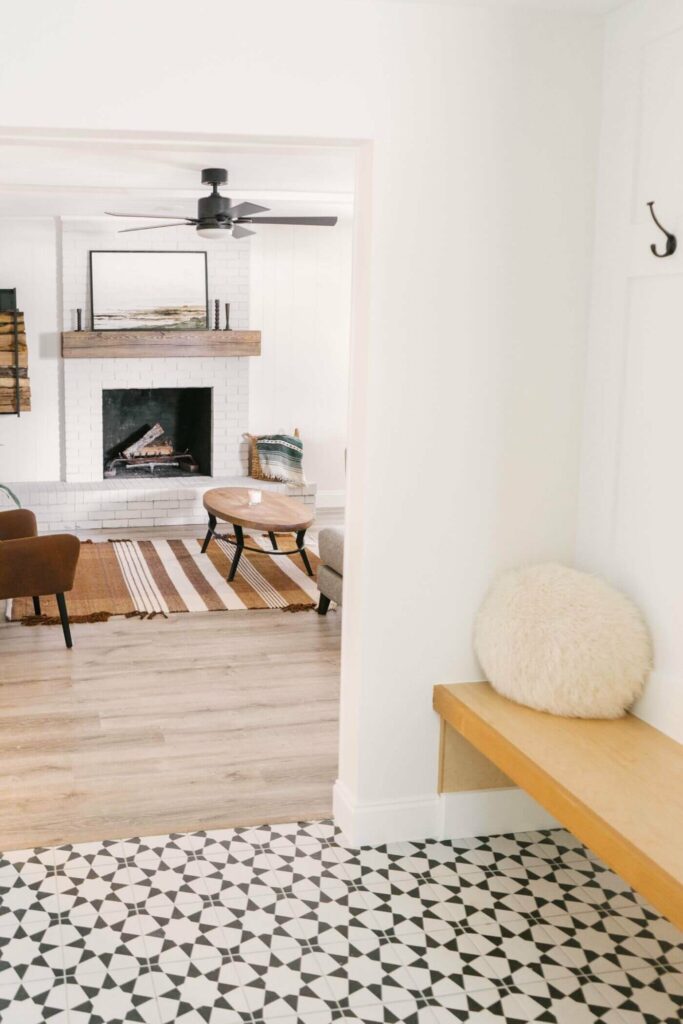
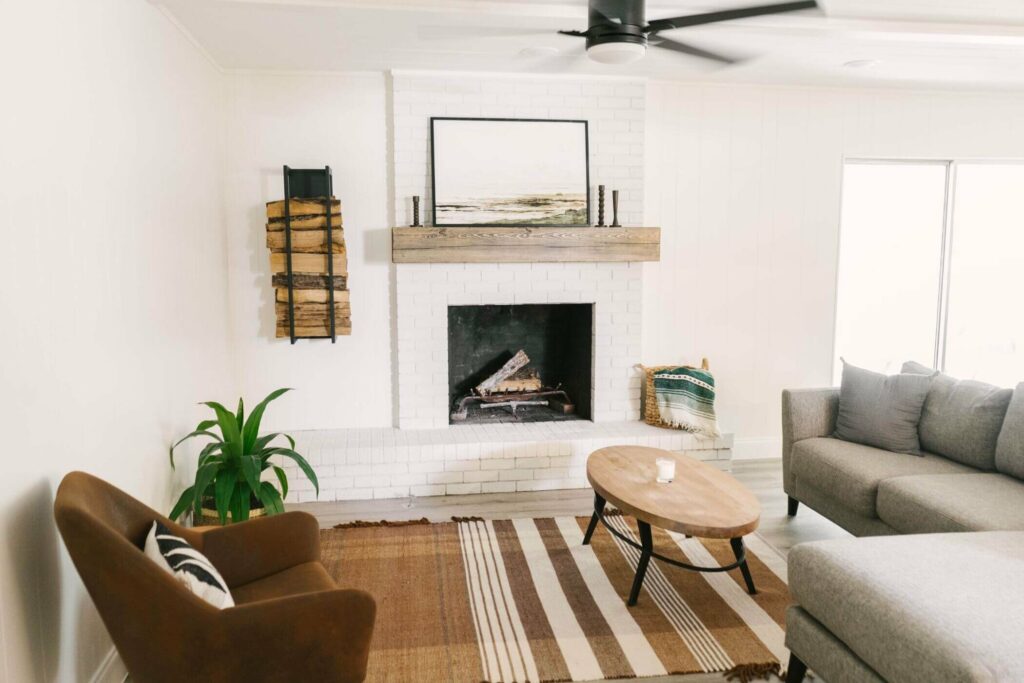
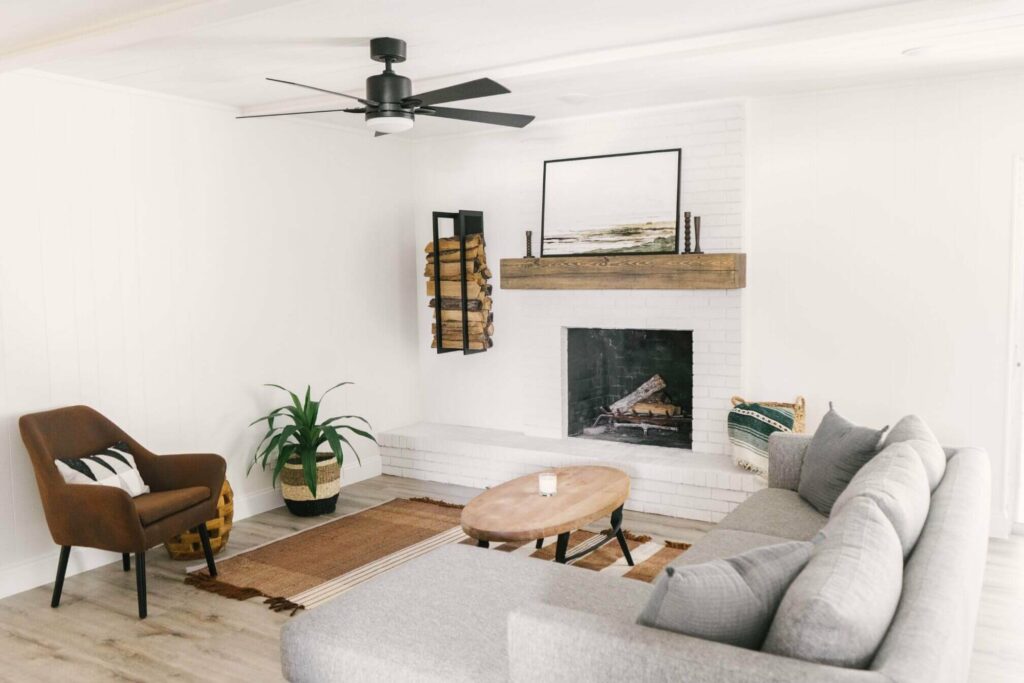
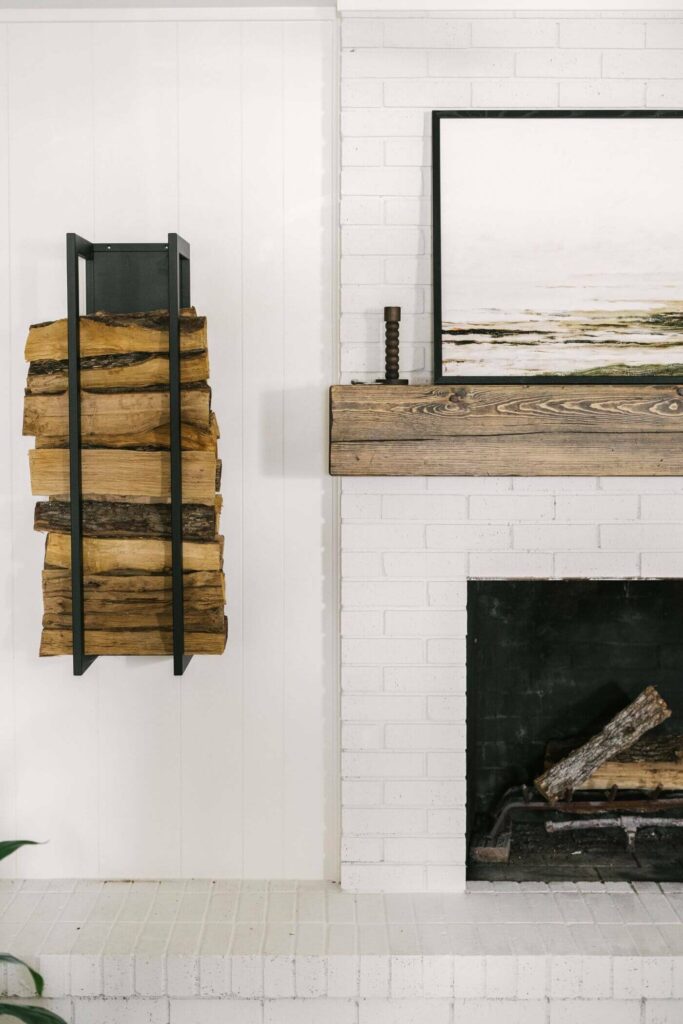
The living room was a huge transformation as well. We decided to paint the paneling white, Sherwin Williams Marshmallow. If you have paneling and decide to do this make sure to prime, prime, prime to give a lasting hold. We hired a professional painter to do this, but I’ve been told the importance of this. We also painted the brick fireplace with Jolie Paint. We shared an full tutorial on the blog here. We accessorized the fireplace with art and a metal firewood holder on the wall that we found on Etsy.
Another big transformation was the popcorn ceiling. Not only was the ceiling dated popcorn, but it had SPARKLES. Maybe that was an upgrade in the 1960’s 🤷🏻♀️ We partnered with UFP Edge to transform this ceiling with their timeless nickel gap shiplap. We love it because it fits together like a puzzle to give a really clean, professional look. It can go in any style and what we love the most is that it made the area look so much bigger. The ceilings immediately felt taller as well. Once the shiplap was installed we added a few can lights and we had a bright and airy modern living room.
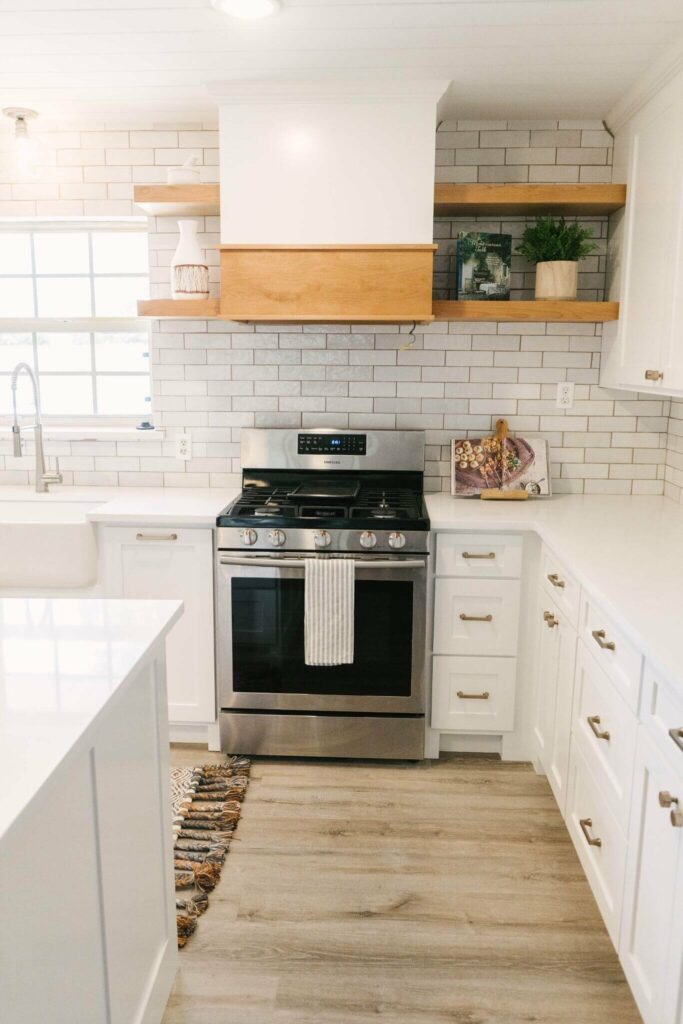
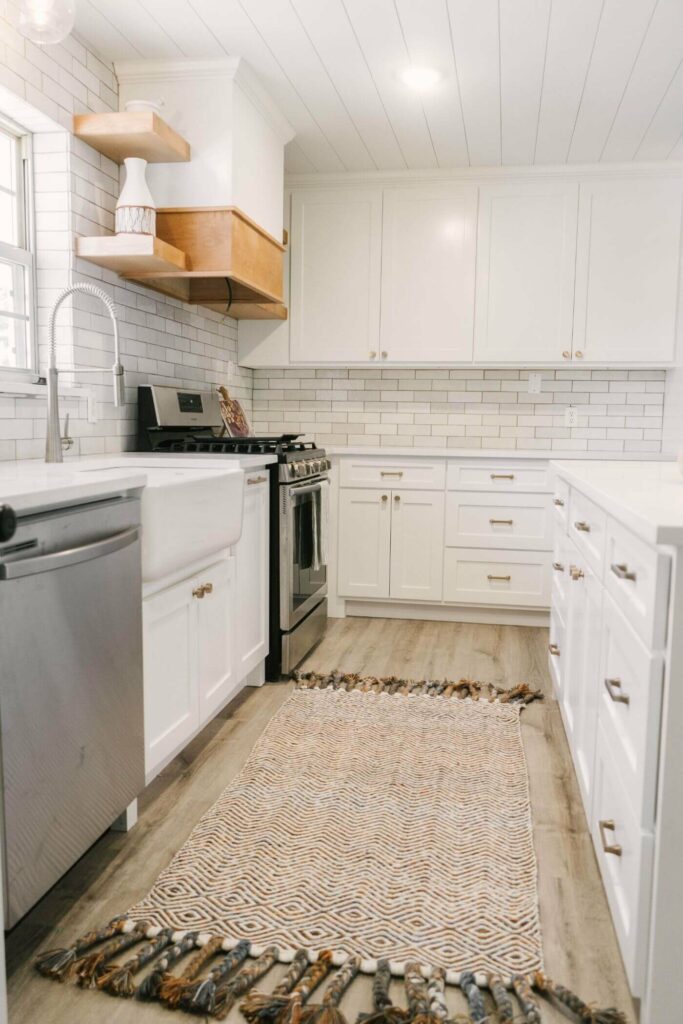
KITCHEN & DINING
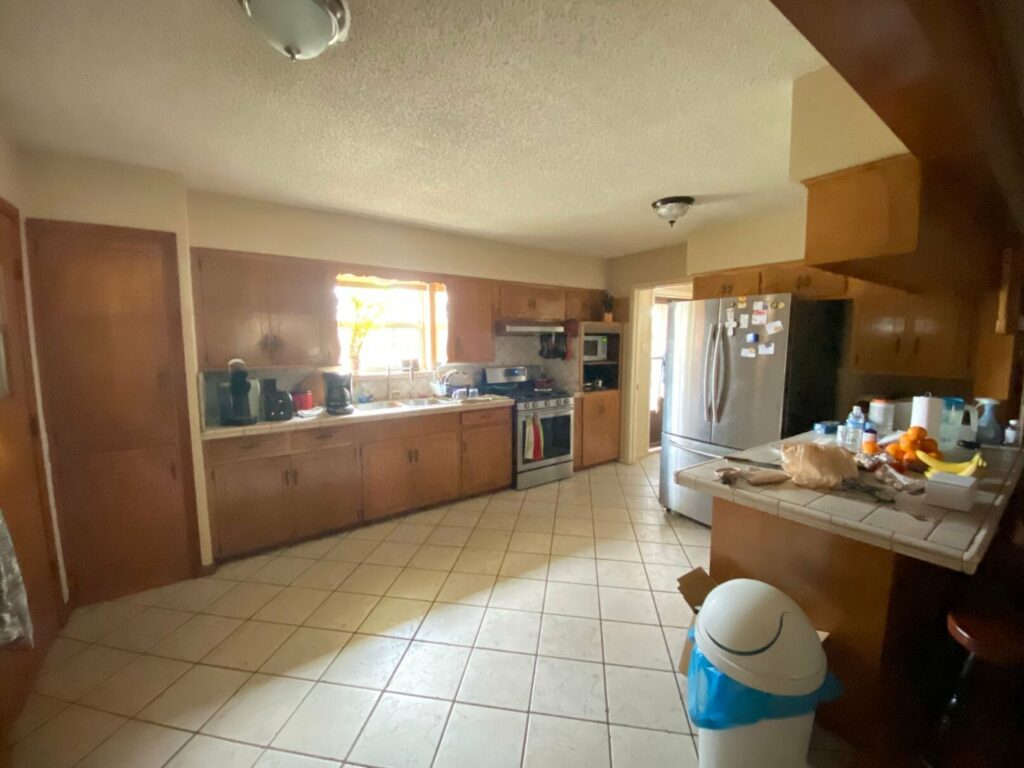
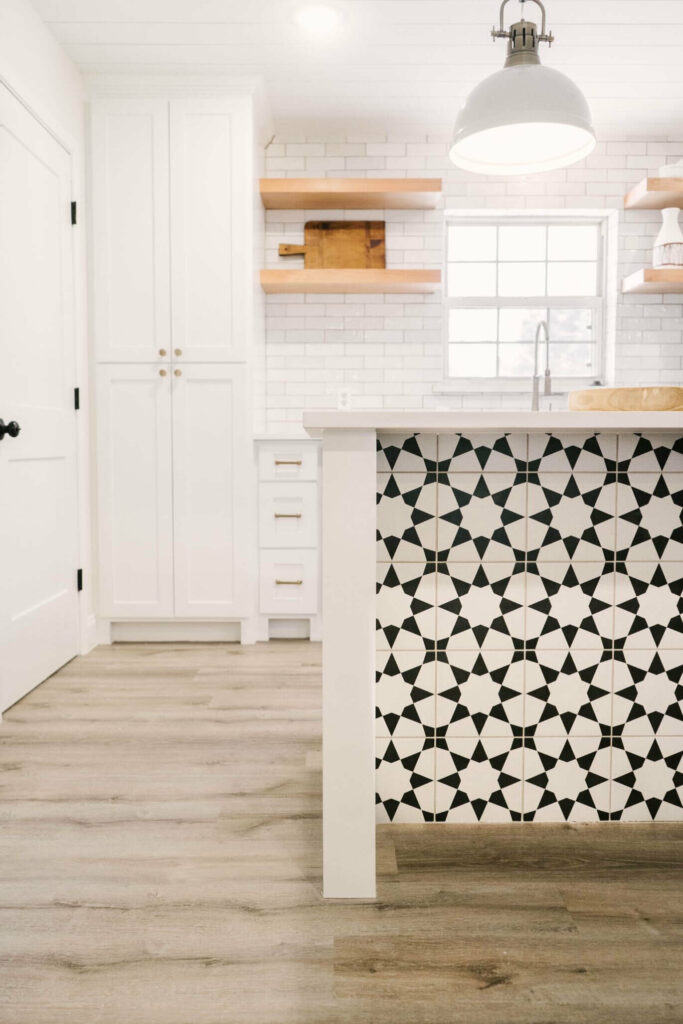
The kitchen was one of my favorite transformations because it’s the heart of a home. I can really imagine someone truly enjoying cooking and gathering here. In the before photo, you’ll see that the kitchen didn’t have a ton of storage in the dated cabinets because of the case opening to the entry that we talked about before and the ugly furr down ceiling that didn’t allow the cabinets to go all the way up. A lot of times we like to simply update with paint and rework a few things, but here there was only one answer….DEMO DAY BABY.
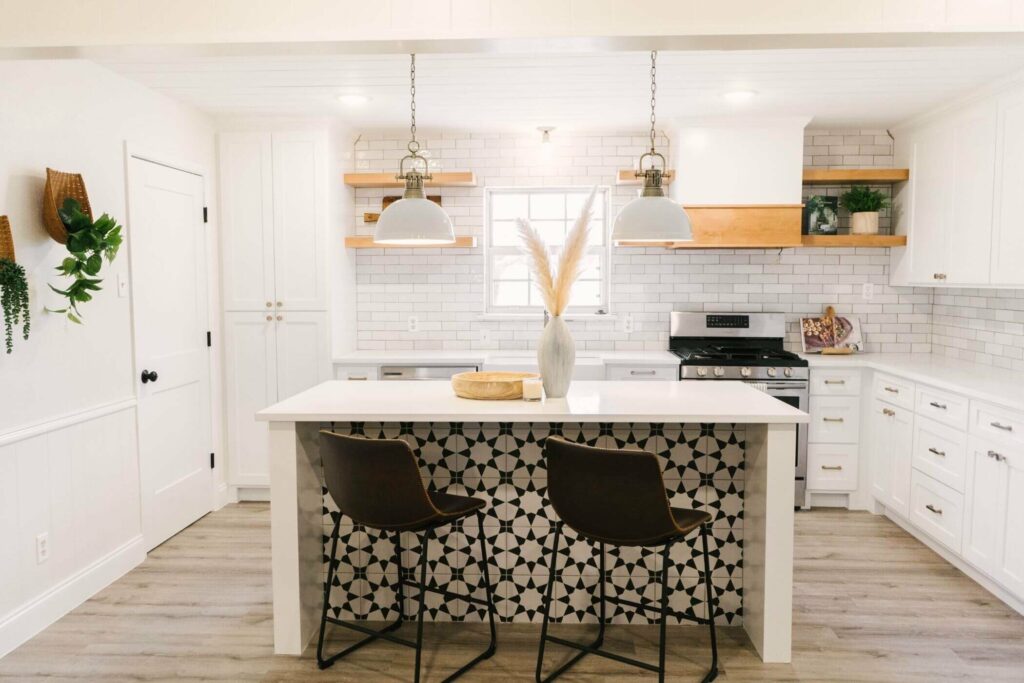
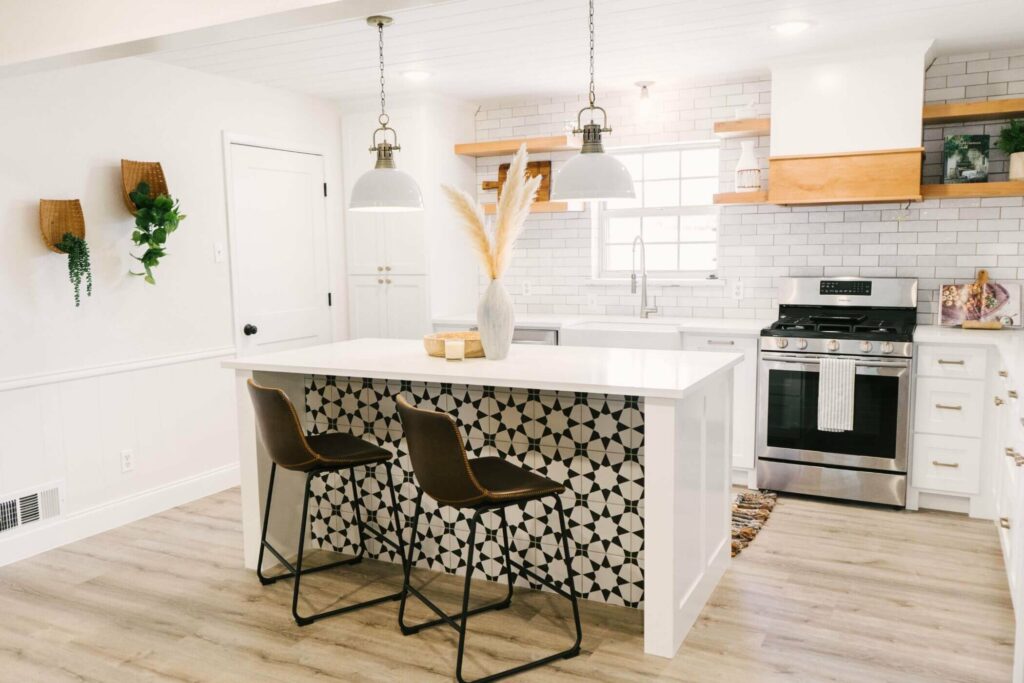
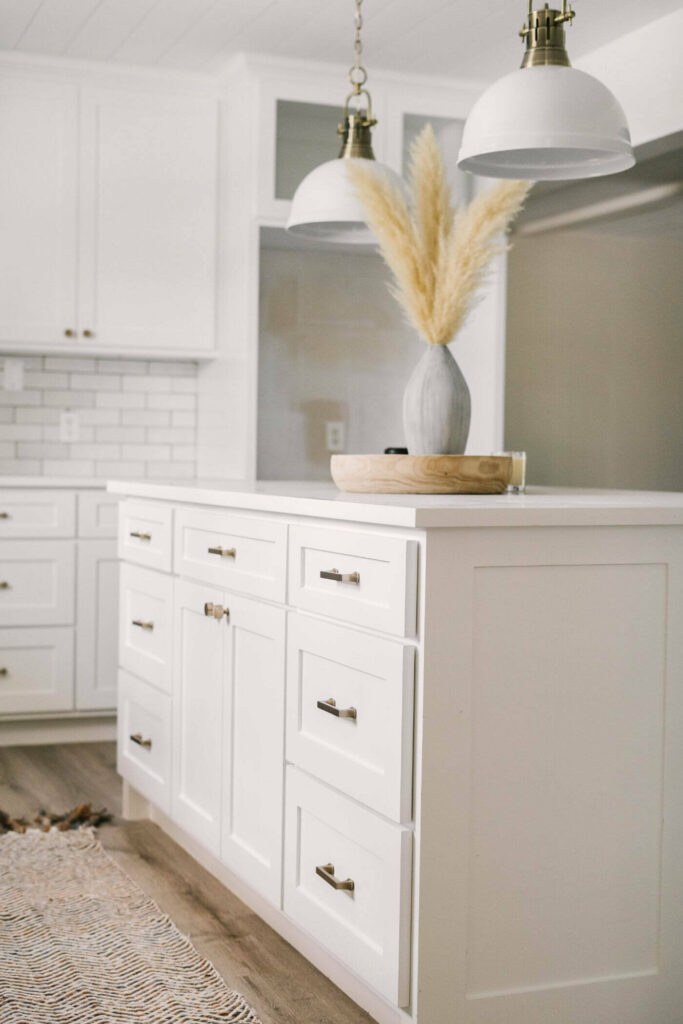
We added brand new cabinets with a big island with a fun statement tile like we used in the entry. This may seem like a bold accent for a flip home, but we loved it and we knew it would be a cost-effective change if the buyer didn’t love it. Simply cover it with white shiplap or wood and you’re good to go without spending very much money at all. We’re confident the buyer will love it though 😋
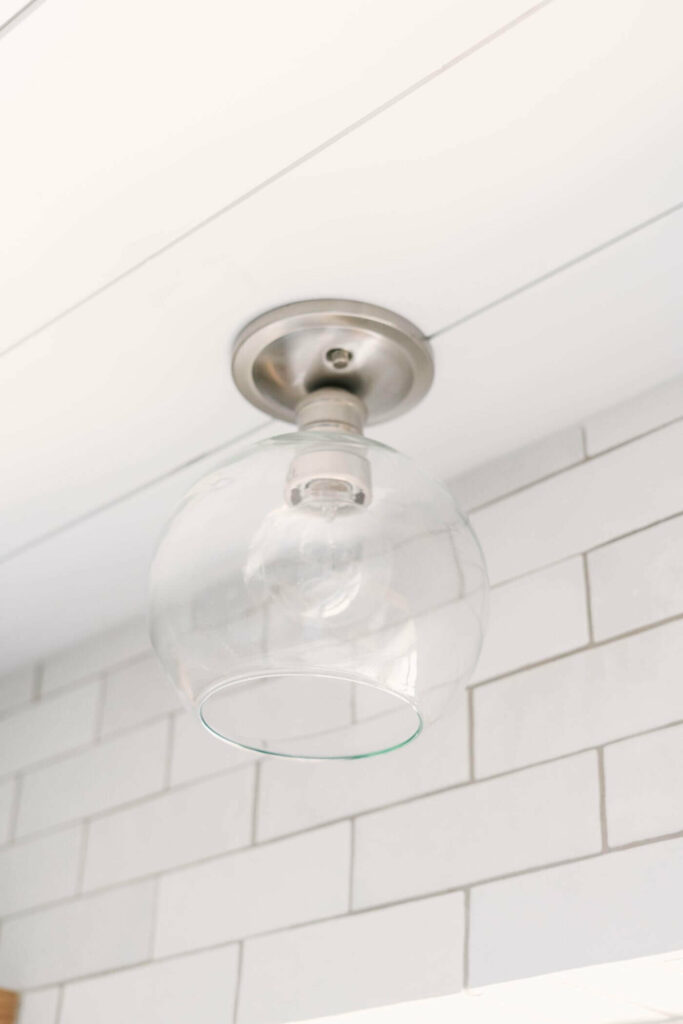
We used Bedrosian’s Cloe Tile for the backsplash with white quartz for the countertops. We continued the UFP Edge shiplap in the kitchen and finished it off with new light fixtures.
BEFORE
AFTER
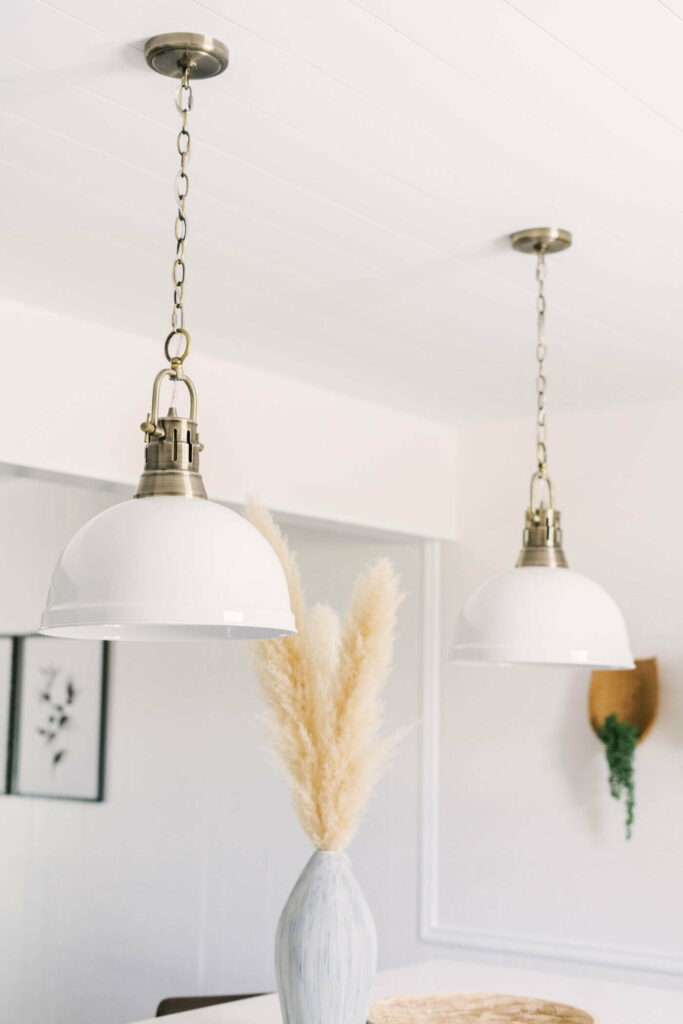
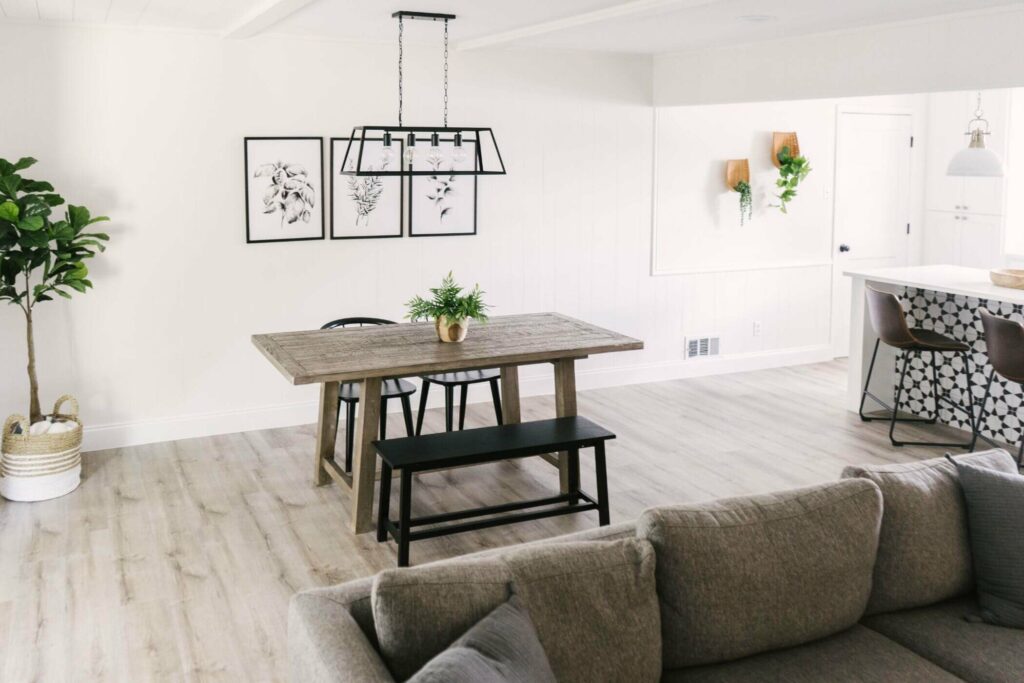
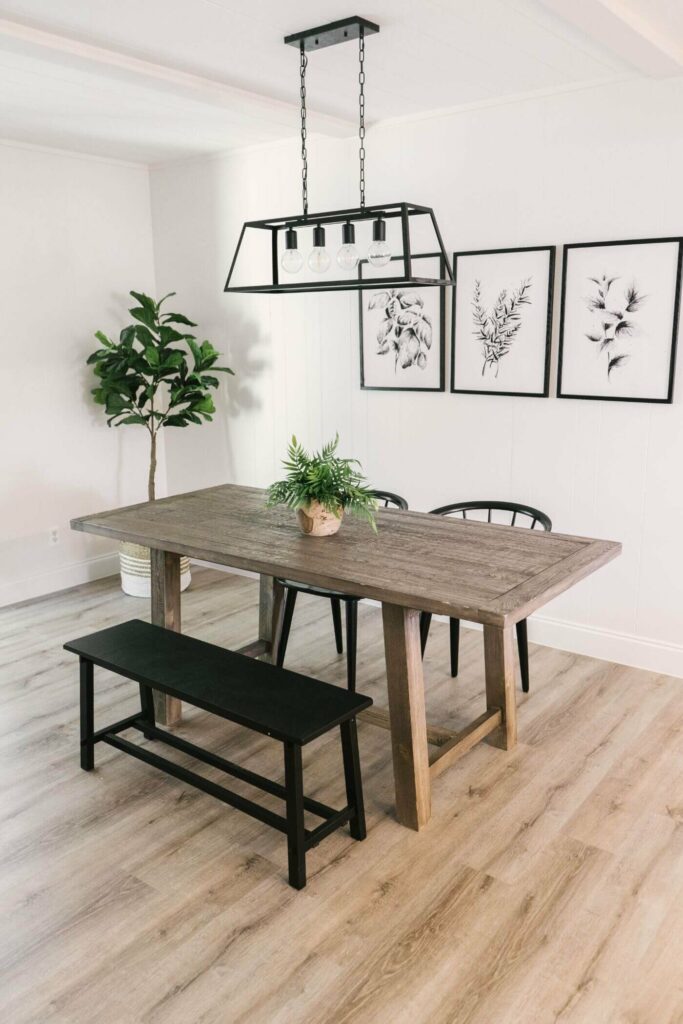
The dining room we simply added a new light fixture to define the space. There was a fan there before and we swapped it out for a fun cage light that will dress up any dining table. We staged it with a table and art and voilà, you have a stunning new dining room that flows into the living and kitchen allowing a family to enjoy each other!
SUNROOM
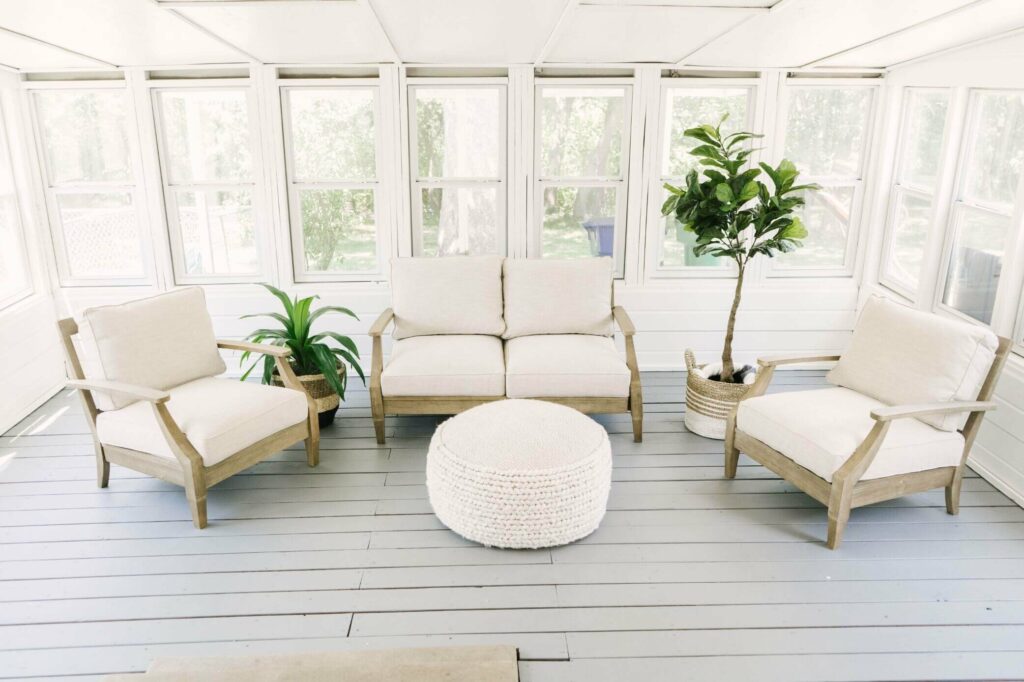
I fell in love with this room the second it was staged. Now my goal in for my next home is to have a sun room that I can have a crazy awesome plant collection and drink coffee in the morning in. What a dream! Maybe I should just move her?
All we did here was paint and stage. The floor was a reddish-brown and the walls were dark like they were inside the home. White and gray did so much magic.
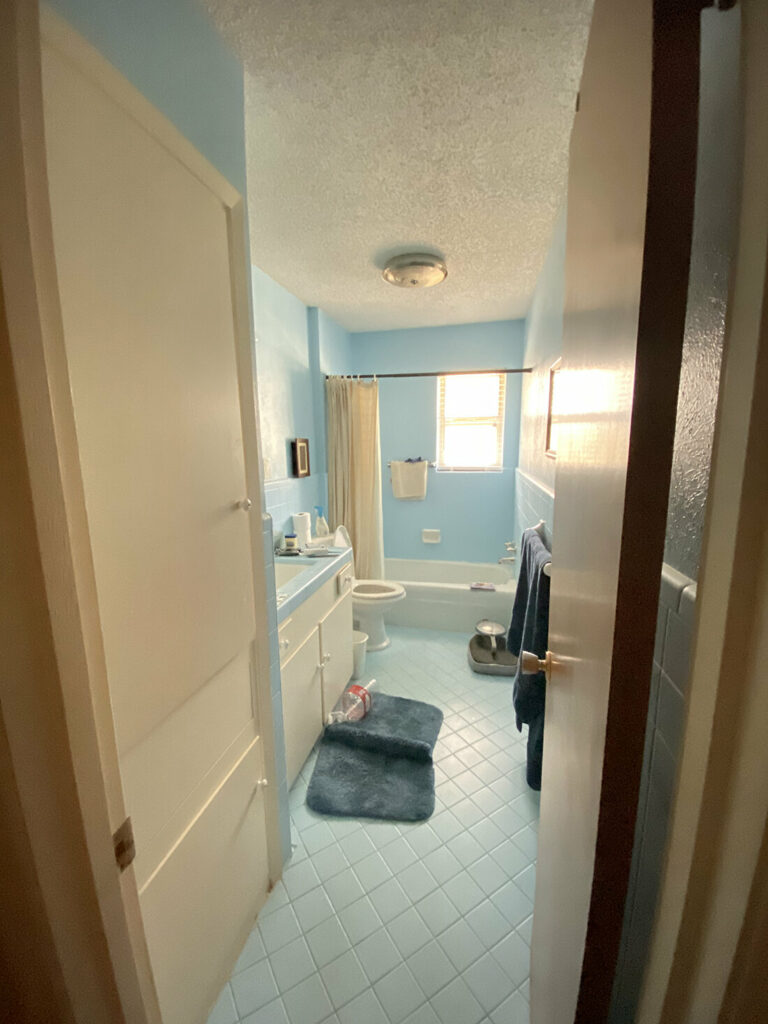
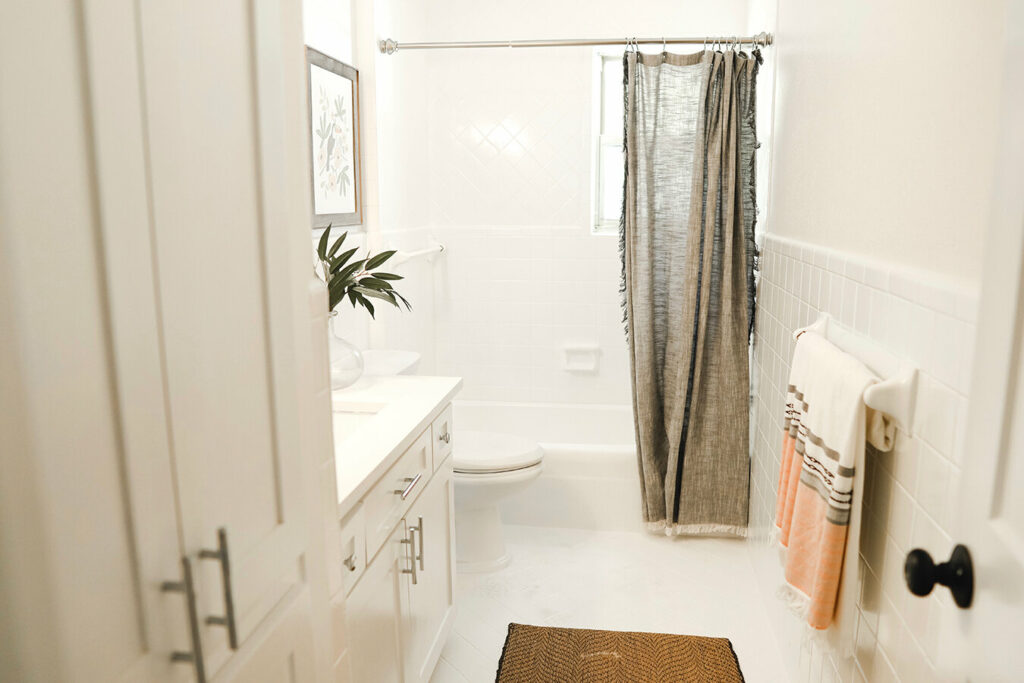
GUEST BATHROOM
Now, this is a transformation! We have painted tile many times on the blog and love the impact it makes for the cost. This is our first time painting such a bold color. We used Rust-Oleum’s Tub & Tile Refinishing Kit and it did it’s magic just like it did in the past. If you want to see how we did this in a past project follow the link here.
BEFORE
AFTER
MORE DETAILS ON THE GUEST BATHROOM TRANSFORMATION
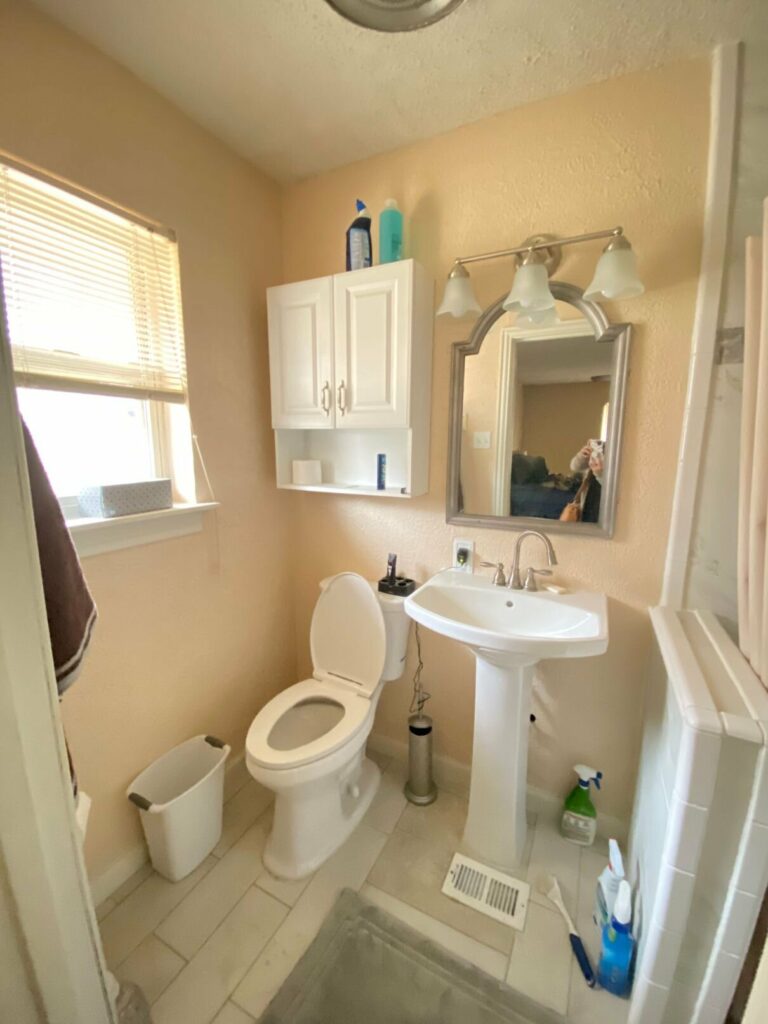
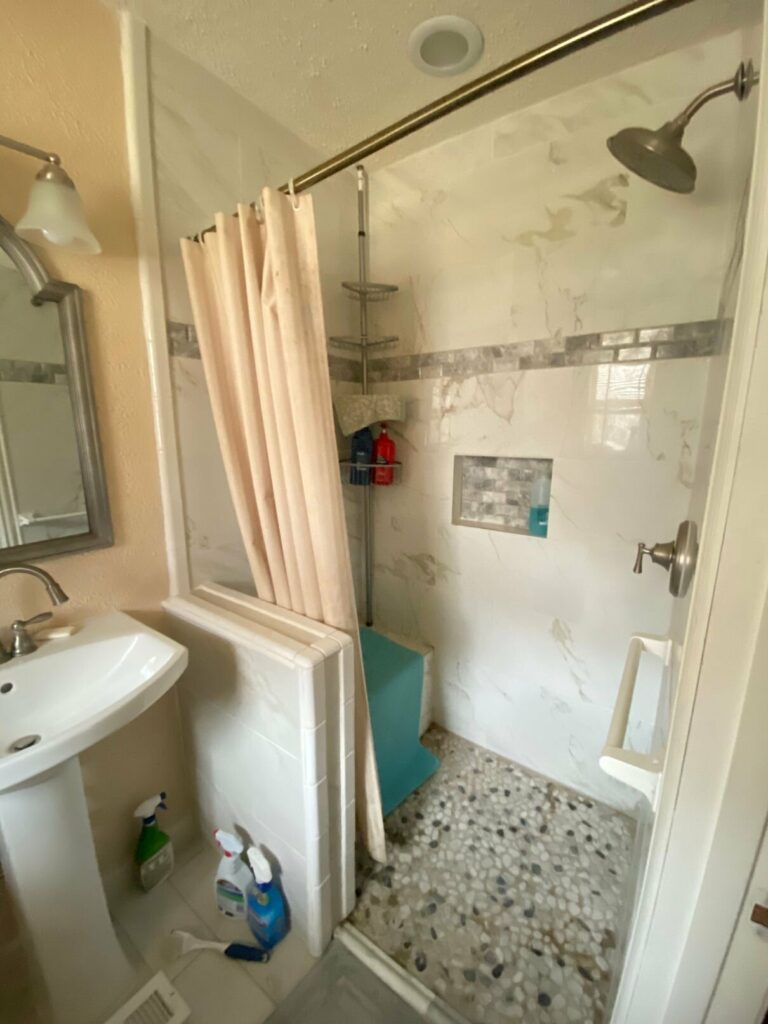
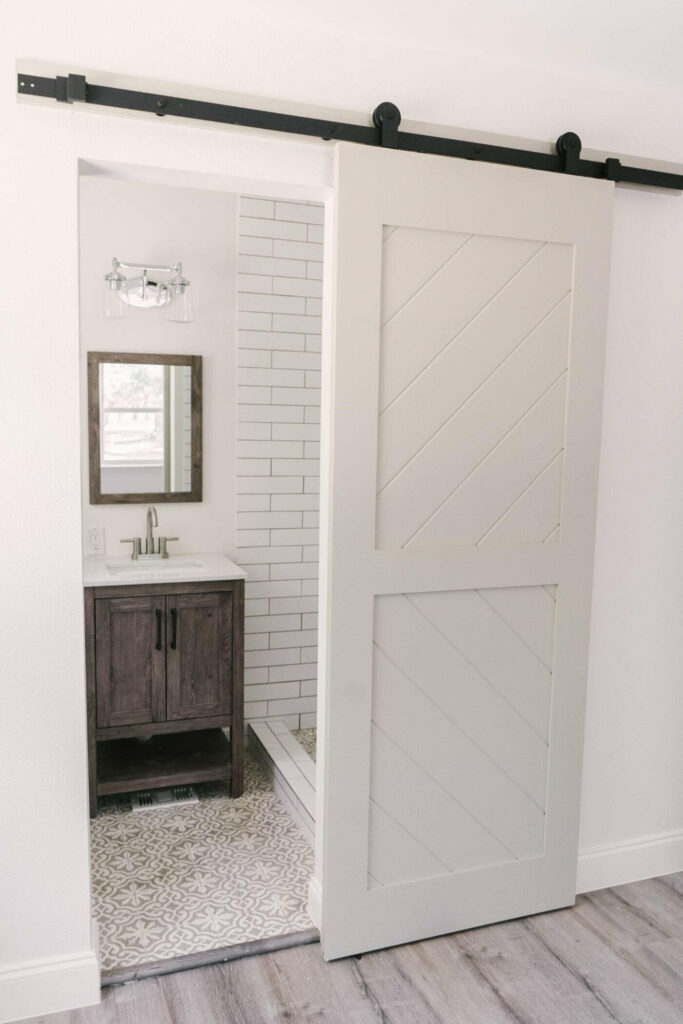
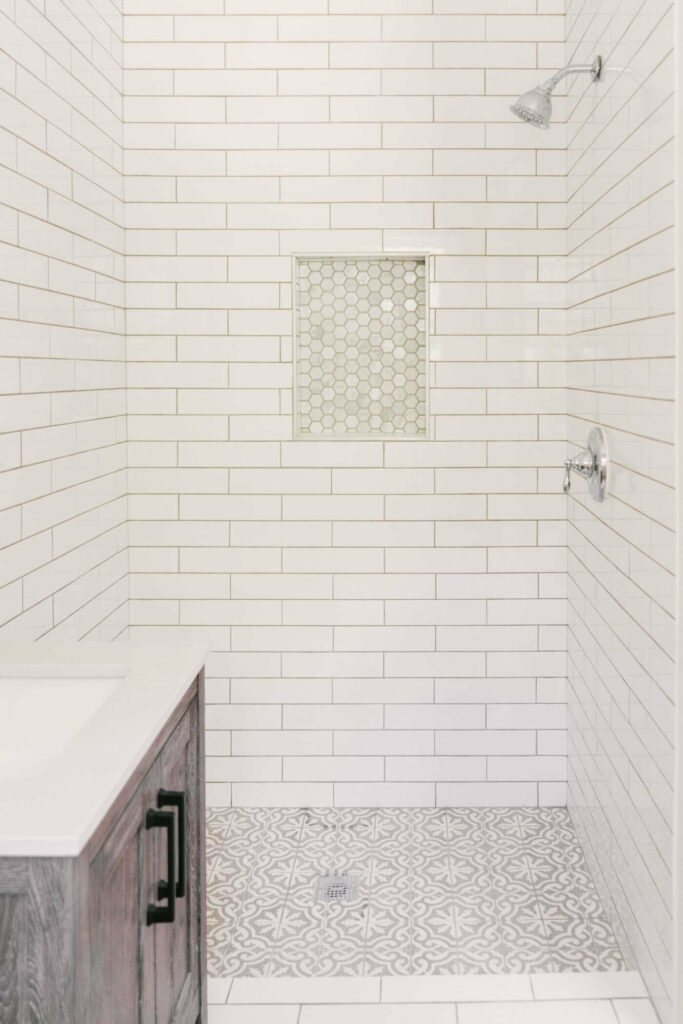
MASTER BATHROOM
This bathroom was beyond what paint could do. Not only were the tile choices not great, but it did not appear that a professional installed it. We updated we a gray and white cement tile on the floor, subway tile on the wall and a marble looking tile in the niche. We swapped out the vanity and light fixture as well. You can see that the walls had some pretty crazy texture that was a lot of work for our painter to update, but man does it look pretty now.
BEFORE
AFTER

FINISHING TOUCHES
We updated the bedrooms with new flooring and light fixtures. Simple, but modern features that make the rooms feel like home. We upgraded to shaker style doors because they make a home feel custom and special. If your home feels cookie cutter this is a great update to make.
BEFORE
AFTER

Today is a fun day to be sharing this tour with you because it’s the day the home goes on the market! Mom and I can’t wait for someone to fall for this house as we did during the renovation 💕 Now who thinks we need to flip another house? 🙋🏻♀️ Comment below your favorite area in the home. Also, have you ever flipped a house before? Any tips for us if we take on another in the future.
📷 PHOTOS BY THE AMAZING Charlee Tabor Photography
PIN FOR LATER

Hi! Can you provide a source for the tile in your entry? Thanks!
Great job! This is my first time on your blog and I love the total transformation of this house! Everything looks so bright, updated and inviting.
This looks awesome! Great job.
Rajwada Farms is the best picnic & adventure park for schools, family & corporates in Delhi-NCR, Here you can enjoy fun activities likes: ZipLine, SkyBike, Bungee Run, Wall Climbing, etc.
<a href="https://rajwadafarms.com/">Best Adventure and Picnic Park in Delhi-NCR</a>
I think it would be really interesting to know the cost of the renovation! You did an awesome job.
Hi, what is the flooring you used throughout the home?
Love your kitchen, can you please reply and tell me what countertop product you used? Quartz name and color. I love the white cabinets and cloe white tile. Looking for a quartz top that won’t clash.