How to Paint Your Brick Exterior with a Sprayer – Wagner Control 130 Review
Today we’re sharing how to paint your brick exterior the EASY & QUICK way!
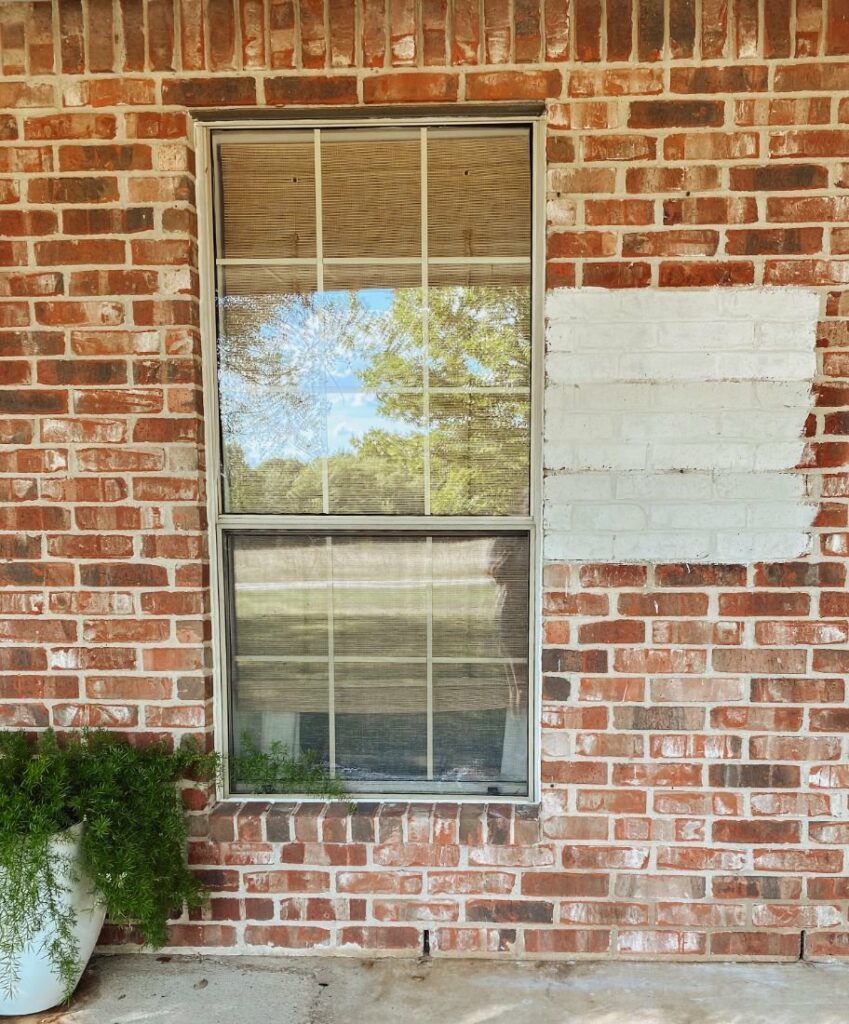
I didn’t hate my brick exterior, but it really didn’t pop after we updated the landscaping. It just felt boring and I wanted an extra dose of curb appeal. I painted my old house, but it took FOREVER (4 full days). I wanted to find a quicker easier way for this home and I definitely did!
TOOLS & SUPPLIES
WAGNER CONTROL PRO 130
Y’ALL this is my favorite tool I’ve ever owned. It’s so easy to use, gets the job done quickly and the job looks so professional. Full disclosure, I was gifted this product, but I PROMISE I’m the biggest fan and have been using it over and over.
You can purchase it at both Home Depot or Amazon.
BEHR MASONRY, STUCCO & BRICK INTERIOR/EXTERIOR PAINT
I got the paint locally at Home Depot. I chose this paint because it had good reviews and I saw a ton of people had used it with a sprayer. I used 10 gallons total. You get 1250 sq. ft. – 2000 sq. ft. of coverage per bucket.
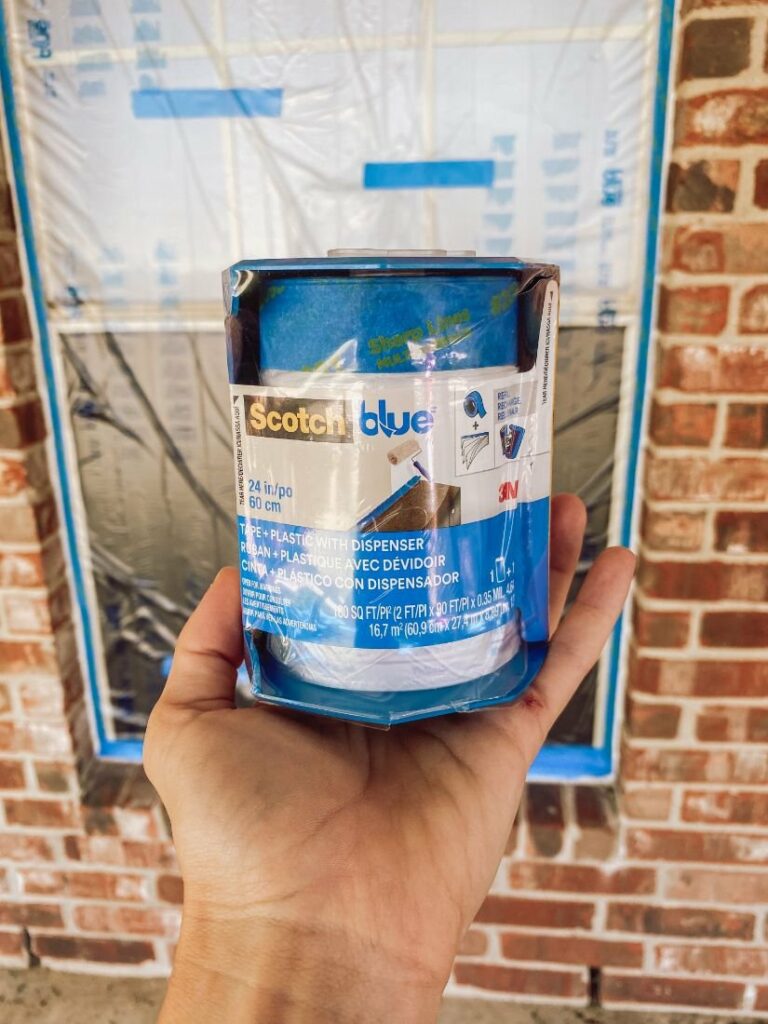
PRE-TAPED PLASTIC
I got this one from Scotch at Home Depot, but they also sell it on Amazon.
PAINT SHIELD
I got this one from Home Depot. I wish I would have purchased 2 or 3. I explain why below.
SMALL PAINT BRUSH
A small paint brush will be helping in doing the top of the windows and other tight areas that the paint shield couldn’t fit.
STEP 1: CHOOSE PAINT COLOR
INSPIRATION

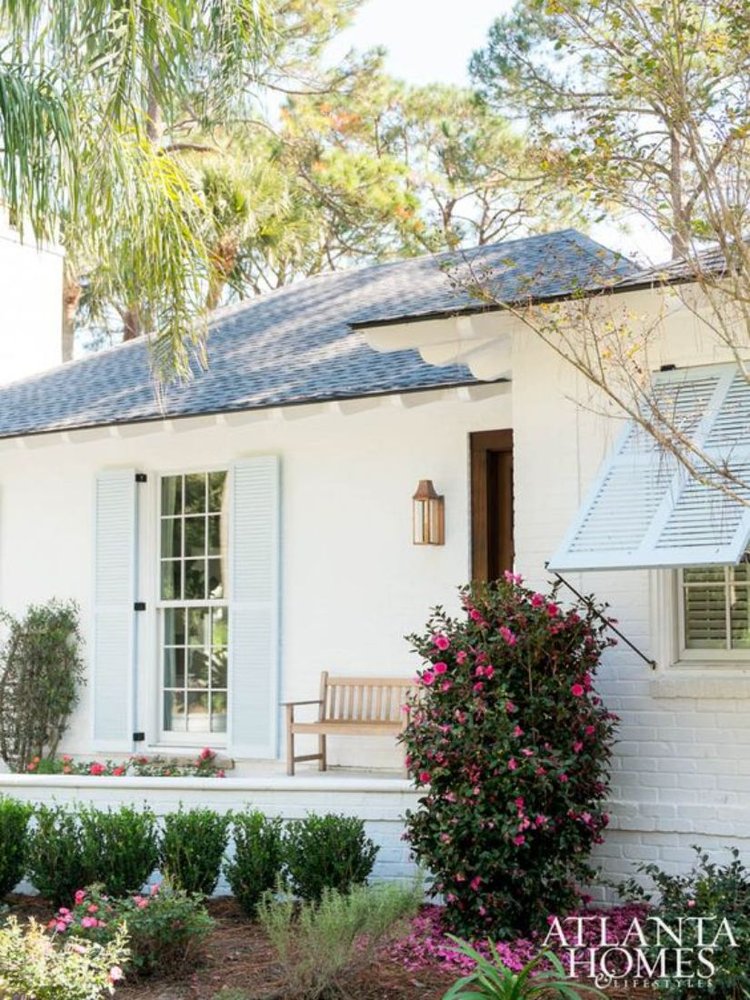
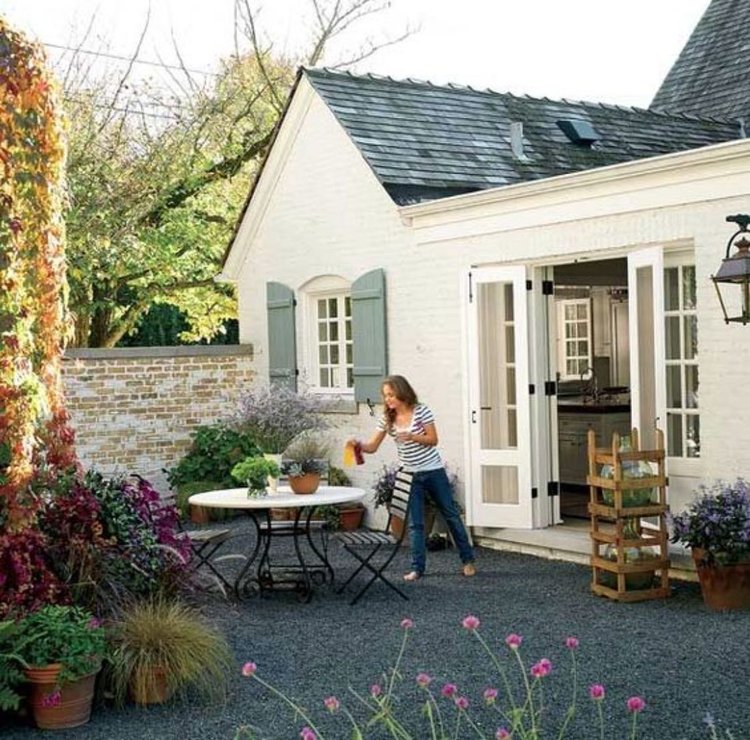
I wanted the brick to be white, but I didn’t want it to be stark. We live on a couple of acres and it feels like the country so I wanted the home to have that look. I didn’t want to paint the siding so I wanted to find a color that went with the bluish-gray siding we already have. The inspiration pictures above helped me pick the choices that would work best. I wanted a white that is warmer, but not too yellow.
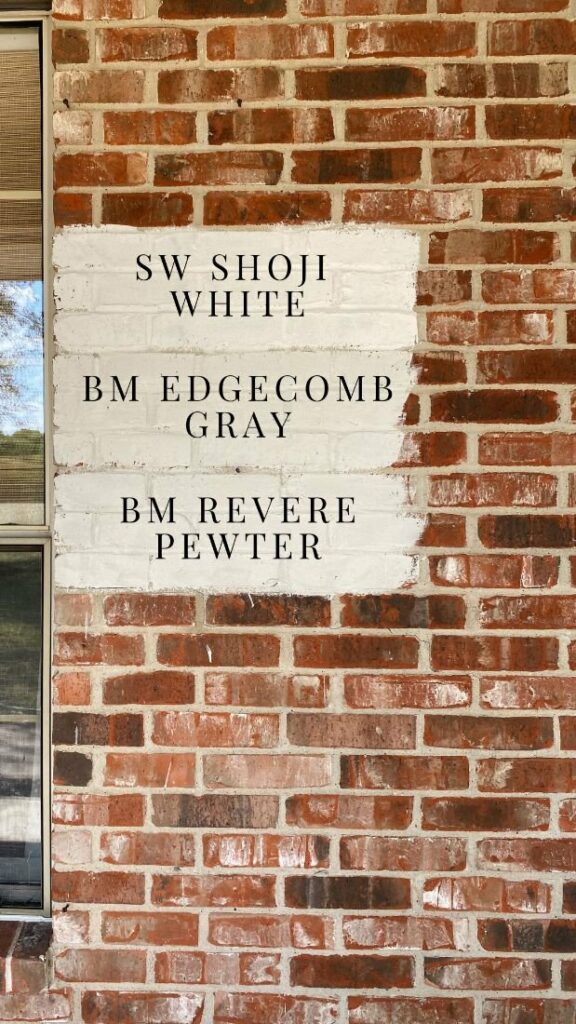
We chose Sherwin Williams Shoji White, Benjamin Edgecomb Gray and Benjamin Moore Revere Pewter. When choosing a color for your brick make sure to do two full coats and to wait until the paint is completely dry before choosing your color. I would also give it a day to see it in different lighting. Paint colors can look completely different in full sun compared to a cloudy day.
Initially our favorite was Edgecomb gray but as it dried we saw that it wasn’t going to look great with our siding. I was glad I waited until it dried to go grab the paint.
COLOR CHOICE
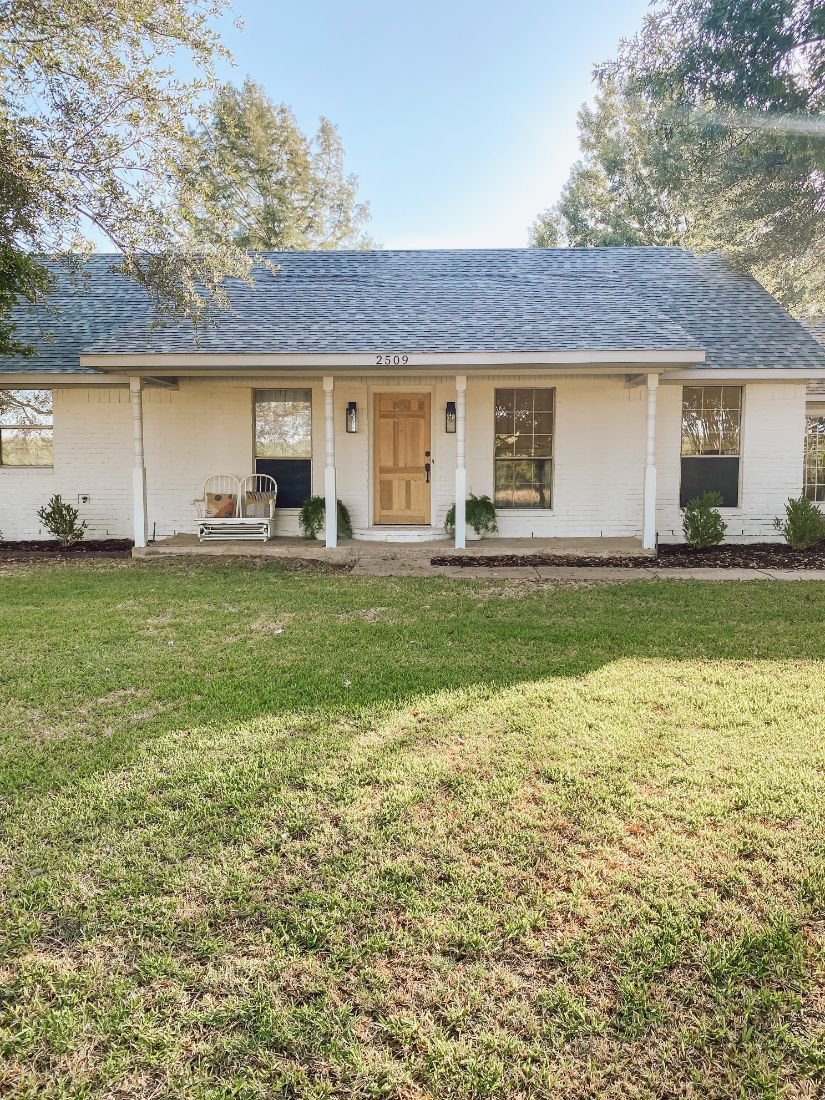
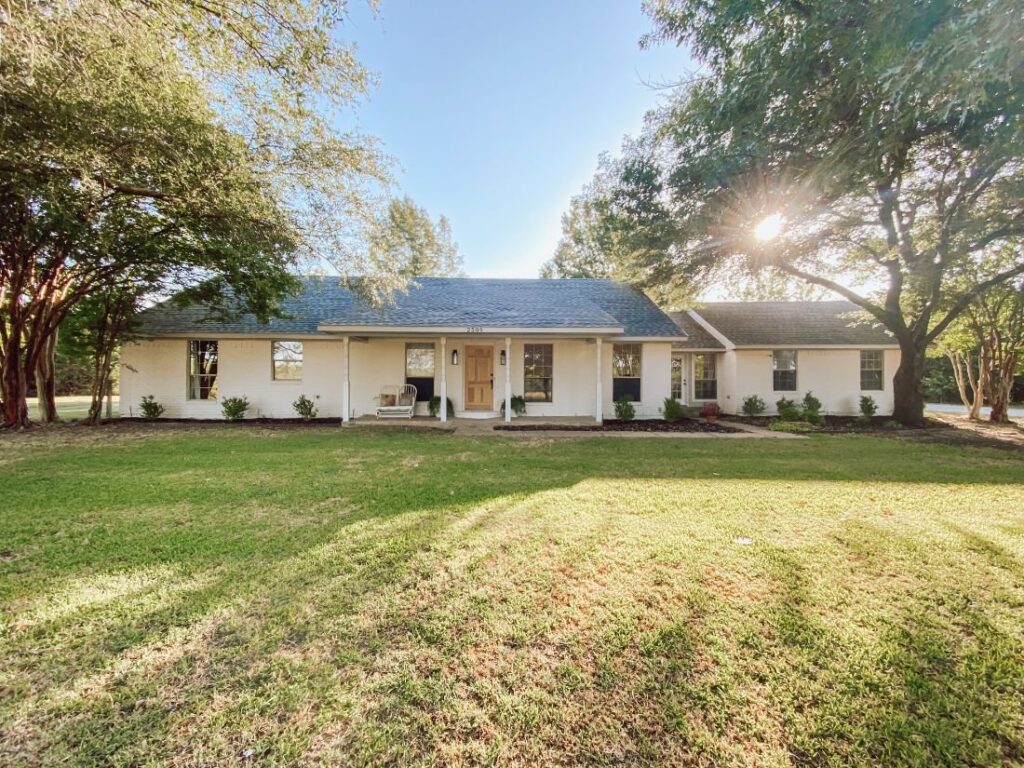
The choice was clear once the paint dried—Sherwin Williams Shoji White. I loved the creamy white tone and how well it looked with the siding we already have.
Mom loved the color so much that she ended up painting her primary bedroom the same color that weekend! If you are looking for a warm white this is a great color to consider.
Make sure you put a test sample on multiple areas of the home so you can see how the undertones show in different lighting. Shoji White could have a yellow undertone in certain lighting so be careful of that.
If you’re hunting for the perfect white paint for your home we have an entire blog post with our favorites and inspiration for each color here.
STEP 2: PREP
POWER WASH THE HOUSE
The first step to prepping the house is giving the brick a good cleaning with a power washer. We used our really affordable Ryobi electric pressure washer. I’d like to one day get one with a bit more power but this one did the trick for this job.
Brick is very porous so they recommend waiting a couple of days for the brick to dry after power washing. We power washed one weekend and then painted the following weekend.
TAPE WINDOWS
Next is taping off the windows. I chose to get the pretaped plastic to do this and it was SO QUICK! If I had to do the tape and plastic individually it would have taken triple the time and been super annoying. I used two full rolls of this and only had to tape off the windows on the front since the back of my house is siding.

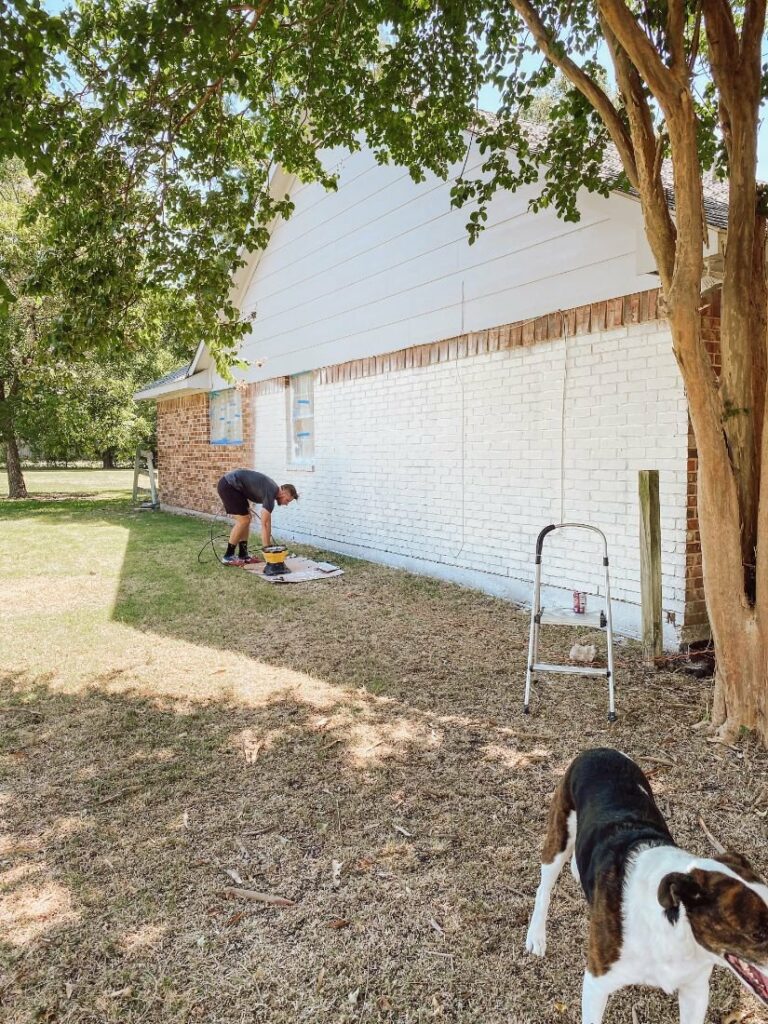
Prepare the Sprayer
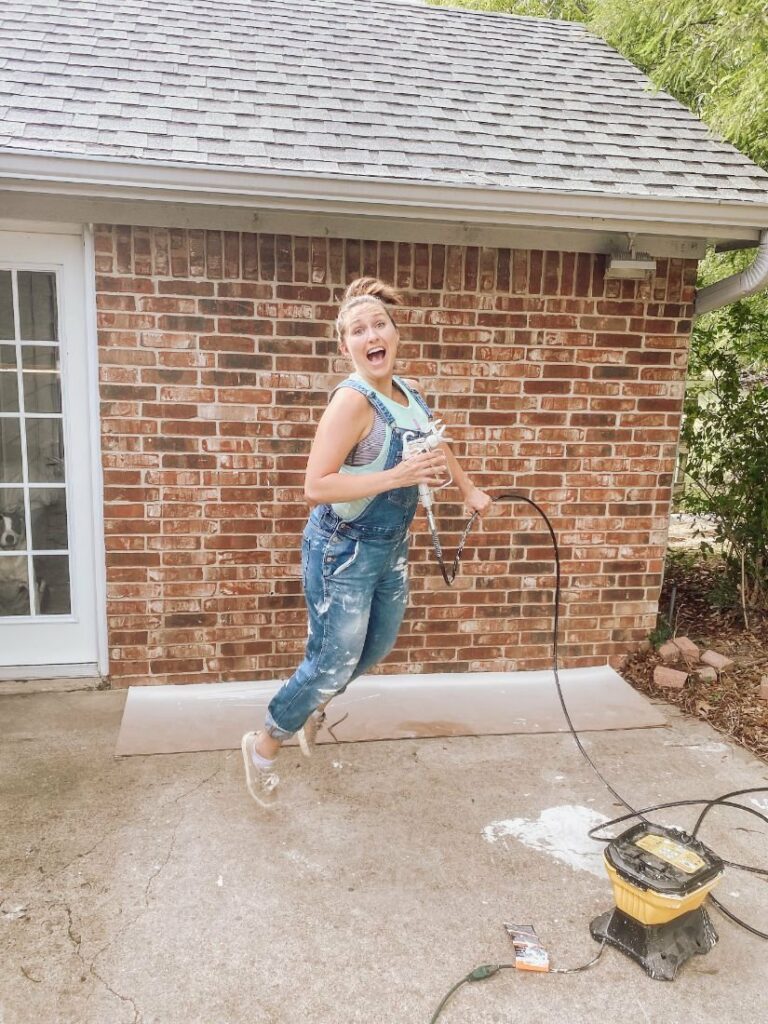
Assemble and prepare the paint sprayer. This video is helpful in getting it set up and ready to go. This entire process took about two minutes. The only issue we had which you’ll see in the video is that when we first sprayed it wasn’t coming out evenly and we simply tightened the spray tip and it worked perfectly.
STEP 3: PAINT THE FIRST COAT
This was the FUN part. I started with the side of my house and that took 7 minutes! SEVEN MINUTES to paint the ENTIRE left side of my house. Y’all that’s CRAZY!
I found that I got the best results when the sprayer was 8”-10” away from the house. When I got closer I noticed the paint was thicker and sometimes resulted in paint runs.
I sprayed from the base to about 6 inches from the top then I went back with the shield to get the 6 inches left unpainted. The shield left a clean crisp line without having to tape the entire house off. If I was to do this project again I would get a couple of extra shields. The paint was getting thick and runny on the shield as I continued so I had to wait for it to dry to be able to use it efficiently. I did wipe it off a few times but that’s still super messy.
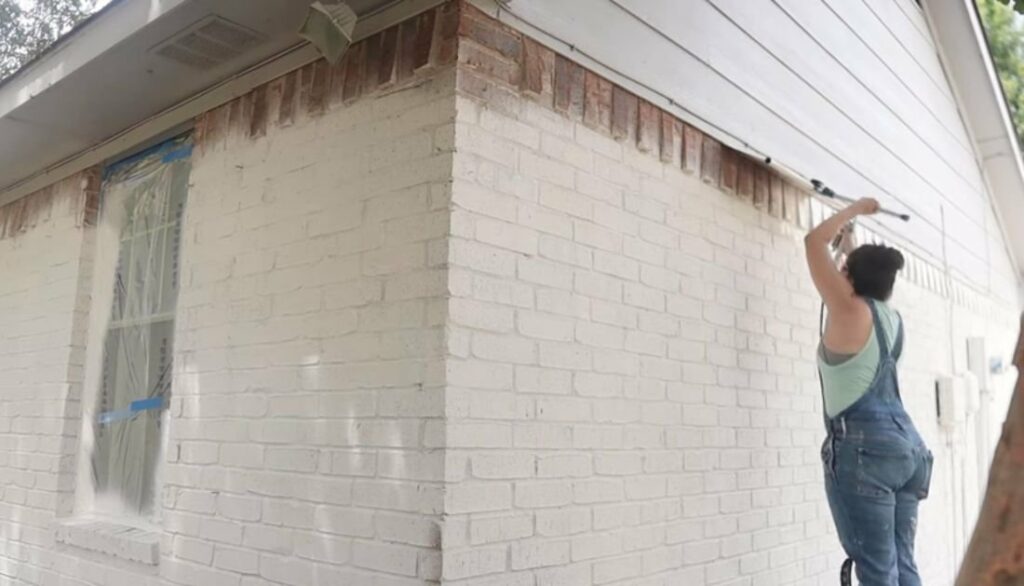
I used a piece of cardboard on the ground to block for overspray in the landscaping. Once I got to the porch it worked better to use something more sturdy to block from overspray so I used a piece of shiplap panel that I had left over from the accent wall in the nursery.
STEP 4: PAINT THE SECOND COAT
This is where truly see the biggest difference. The first coat looked good but the second coat was so even and professional looking. I did the first coat and my husband did the second. We had to trade off like that so that one of us could be inside with the kids.
FINAL
The last step was going around with a paintbrush in spots where the shield couldn’t fit to block overspray. For me, this was the tops of my windows and the step in front of my front door.
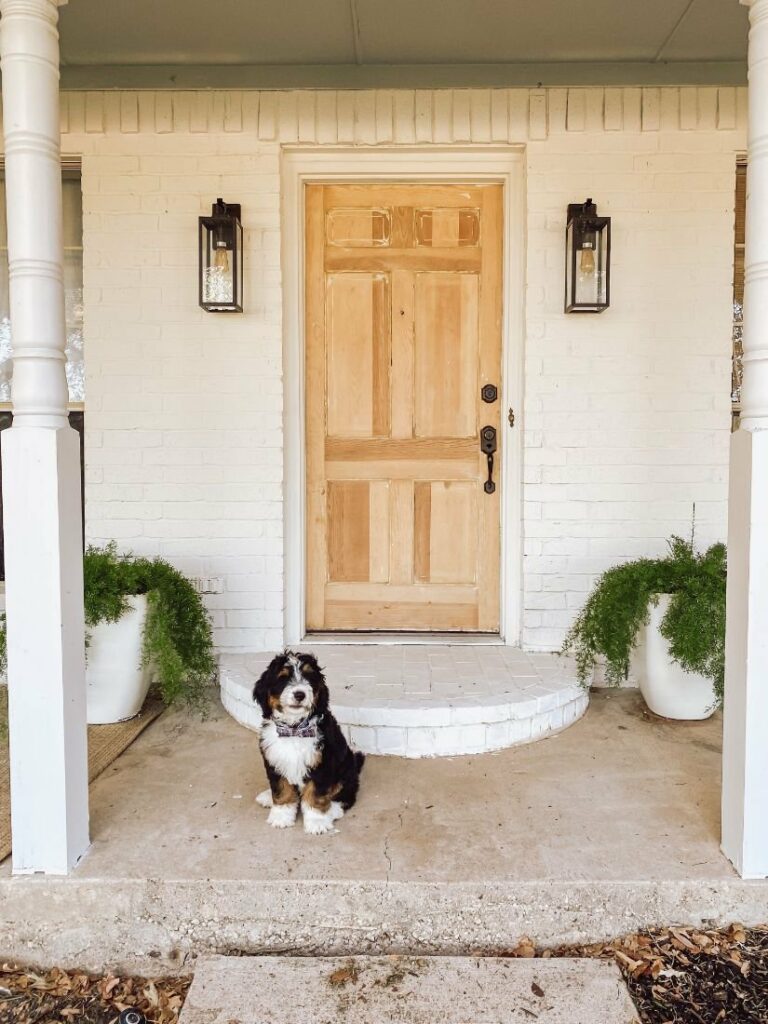
I swapped out the sconces on the porch and changed the door as well. I’m so happy with how it turned out and now all we have left are small projects that will be the cherry on top!
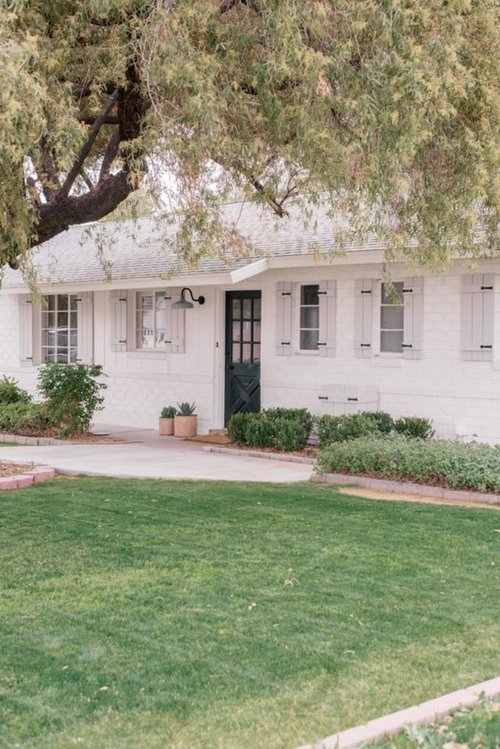
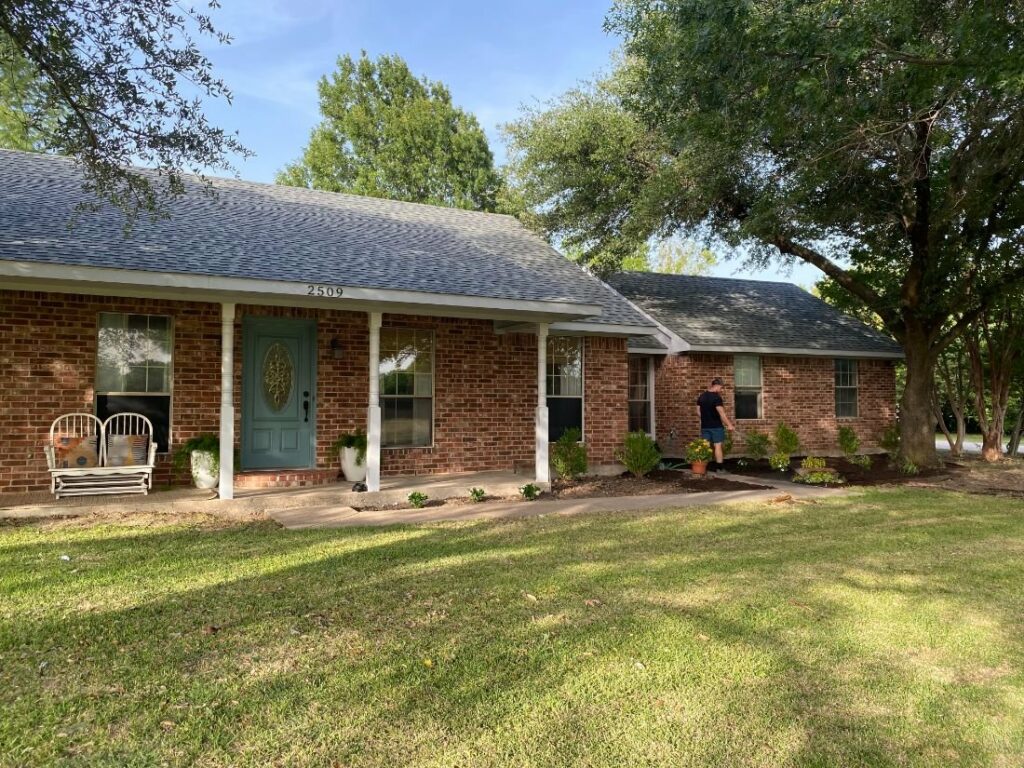
BEFORE
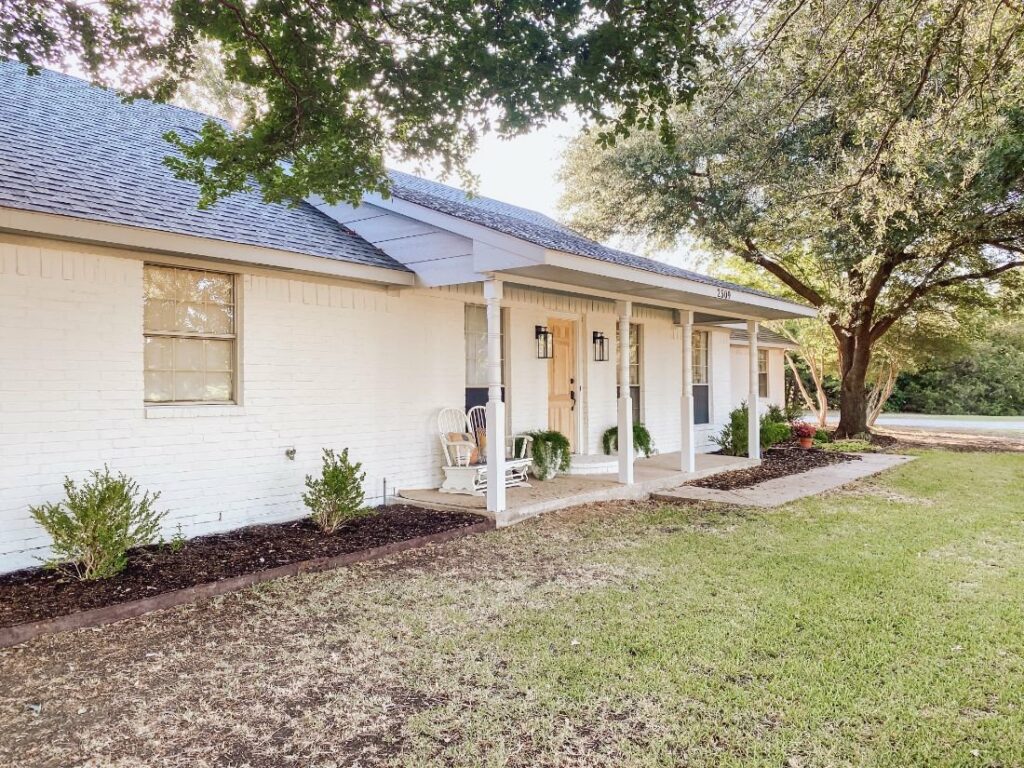
AFTER
NEXT PROJECTS FOR THE EXTERIOR
FINISH THE FRONT DOOR
I found a solid wood door on Facebook Marketplace for $80. I stripped the front down and had it installed. I still need to give it a light sanding and stain it. I bought a few stain samples but still haven’t decided which stain will be best! If you have suggestions leave them in the comments. I also got a new puppy who was excited to pose with the new door 😉
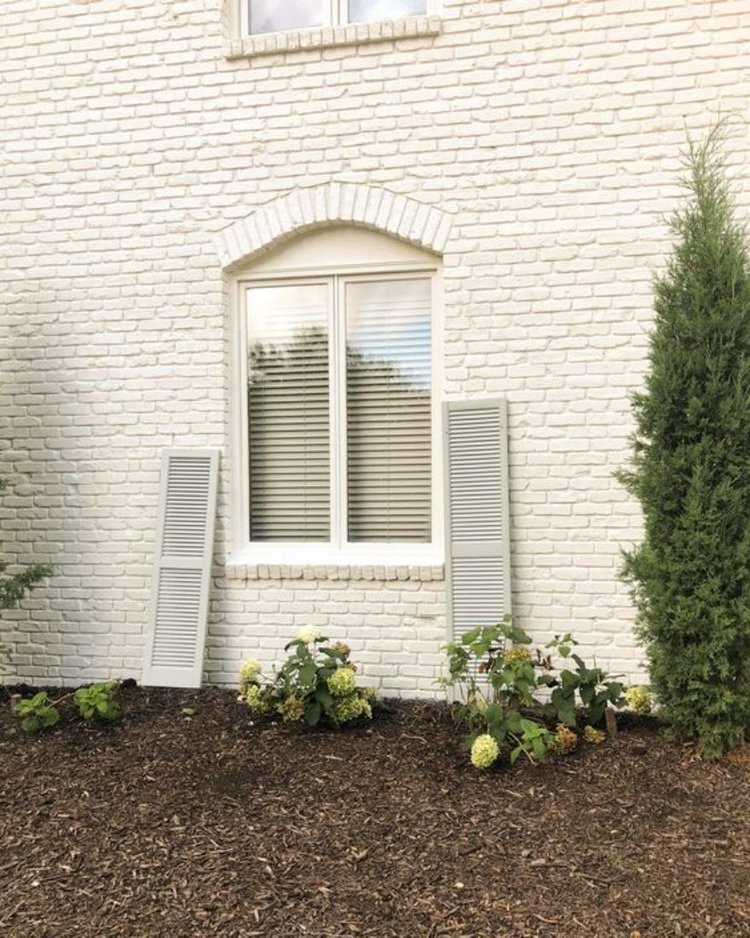
ADD SHUTTERS
I wasn’t sure if the house would need shutters to feel complete but after it was painted both mom and I felt like it really needed them. I thought about DIYing them but found some really AMAZING ones at our favorite antique shop called Antiques & Vintage in Forney, Texas and so we’re excited to have those installed soon. They’re really pretty natural wood from Egypt.


REFRESH THE LANDSCAPING
The landscaping is actually brand new but we installed it in this crazy Texas heat. It’s been 105 almost every day this week. A lot of it still looks great, but a few of the smaller plants didn’t survive so once the weather calms down we’ll have to plant some new ones. Luckily, my hydrangeas have made it so I’m thrilled about that.
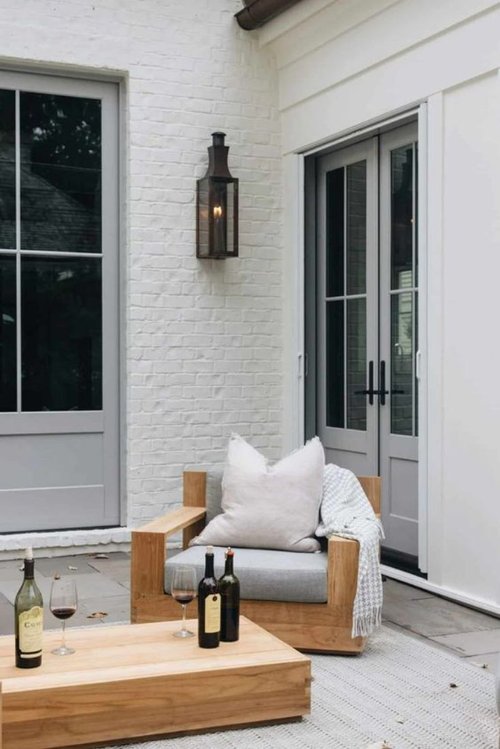
PATIO FURNITURE
I’m in the market for patio furniture in the front and the back. I would love a swing on the front porch. We hang out a ton in the front since it’s shaded by the big trees most of the time so having some great seating is important to me.
All in all this project was a breeze! We completed the entire exterior in one day. We did it on Fourth of July weekend thinking we’d need Saturday – Monday to get it all done, but we had it all done Saturday with only one of us working! That sprayer is most definitely the ticket and I’m brainstorming many more ways to use it!
I hope this post was helpful. If you have any questions or thoughts be sure to leave them in the comments below. We love hearing from you!